
介绍
Part-DB是一个开源的器件管理工具,博主用于管理个人的电子器材,最近捣鼓了一下这个工具,由于手头还有一块闲置的赛昉·星光2的开发板,所以我打算一起拿来捣鼓一下,如果不成功,就用树莓派(生气😠)
1.安装
大家可以直接按照 官方安装指导 来安装即可,我也是参考官方的。
(1)安装docker和 docker-compose
这一步根据网上安装就好啦,我就不赘述啦0_0
(2)在ubunut创建所需要的目录文件文件
# 创建所需要的目录 mkdir Part-DB cd Part-DB mkdir db public_media uploads touch docker-compose.yaml # 这是配置文件 (3)编辑 docker-compose.yaml
内容如下,根据官网的示例进行修改:
version: '3.3' services: partdb: container_name: partdb # By default Part-DB will be running under Port 8080, you can change it here ports: - '8080:80' volumes: # 这里就是关于docker挂载的文件了 - ./uploads:/var/www/html/uploads - ./public_media:/var/www/html/public/media - ./db:/var/www/html/var/db restart: unless-stopped image: jbtronics/part-db1:1.11 # <-----就是这个位置 environment: # Put SQLite database in our mapped folder. You can configure some other kind of database here too. - DATABASE_URL=sqlite:///%kernel.project_dir%/var/db/app.db # In docker env logs will be redirected to stderr - APP_ENV=docker # You can configure Part-DB using environment variables # Below you can find the most essential ones predefined # However you can add any other environment configuration you want here # See .env file for all available options or https://docs.part-db.de/configuration.html # !!! Do not use quotes around the values, as they will be interpreted as part of the value and this will lead to errors !!! # The language to use serverwide as default (en, de, ru, etc.) - DEFAULT_LANG=zh # The default timezone to use serverwide (e.g. Europe/Berlin) - DEFAULT_TIMEZONE=Asia/Shanghai # The currency that is used inside the DB (and is assumed when no currency is set). This can not be changed later, so be sure to set it the currency used in your country - BASE_CURRENCY=EUR # The name of this installation. This will be shown as title in the browser and in the header of the website - INSTANCE_NAME=Part-DB # Allow users to download attachments to the server by providing an URL # This could be a potential security issue, as the user can retrieve any file the server has access to (via internet) - ALLOW_ATTACHMENT_DOWNLOADS=1 # Use gravatars for user avatars, when user has no own avatar defined - USE_GRAVATAR=0 # Override value if you want to show a given text on homepage. # When this is empty the content of config/banner.md is used as banner #- BANNER=This is a test banner<br>with a line break # If you use a reverse proxy in front of Part-DB, you must configure the trusted proxies IP addresses here (see reverse proxy documentation for more information): # - TRUSTED_PROXIES=127.0.0.0/8,::1,10.0.0.0/8,172.16.0.0/12,192.168.0.0/16 注意:"image: jbtronics/part-db1:1.11 "这个参数是比较重要的,他会在本地看看是否存在了镜像!!!
(4)实用 docker 命令进行构建
docker-compose up -d (5)初始化数据库
# 进入容器 docker exec -it --user=www-data partdb /bin/bash # 在容器内执行 php bin/console doctrine:migrations:migrate # 这个你可以多次执行,反正初始化之后就会弹出你已经初始化完成了 (6)输出结果
等待输出密码后退出容器,控制台会输出一个高亮的代码,也就是待会登录的用户名和密码,之后实用浏览器访问 http://localhost:8080 即可:
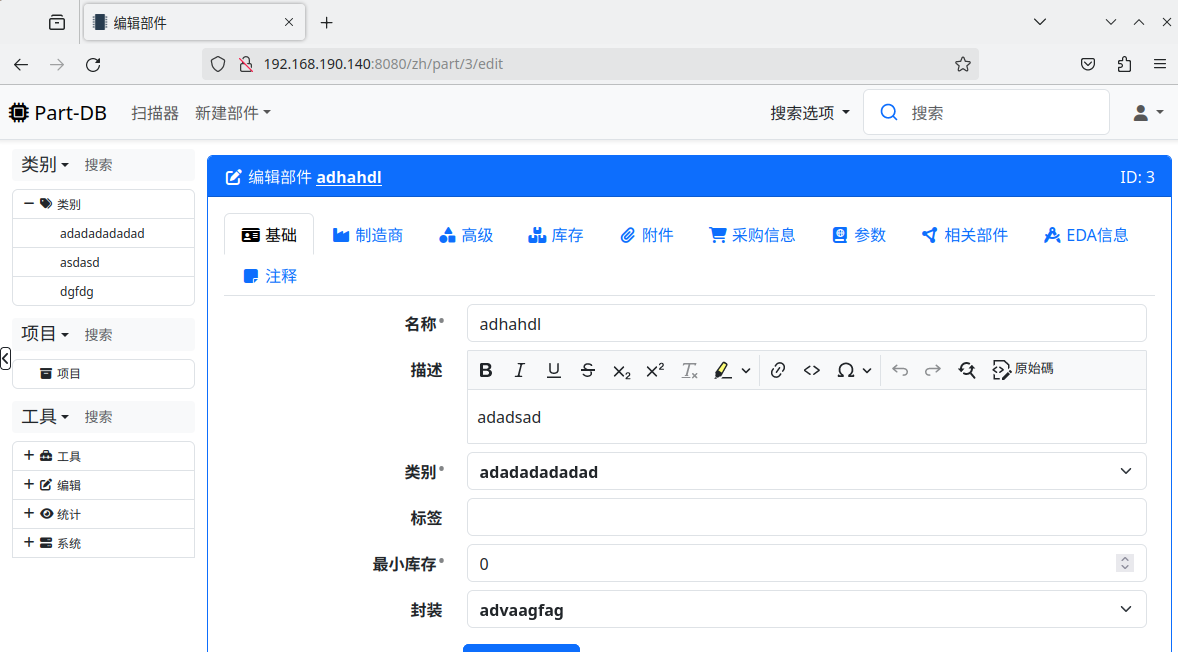
[warning] The initial password for the "admin" user is: xxxxxxxxxx # xxxxxxxxxx 这个就是密码了 (7) 网页结果
这里我创建了两个类别,方便待会移植到另一个虚拟机的时候做对比

2. docker数据迁移
(1)docker容器导出
将容器导出之前,要先commit一下,先commit成一个新的镜像,保存之前做的修改,不然数据没法一起导出,然后save一下就好了,具体操作如下
sudo docker commit -p -a "qm1412" -m "my first" ae8051601c61 mypartdb:v1 参数说明
- -a : 提交镜像作者的名字
- -m :提交的时候的文字说明
- -p : 提交时暂停运行状态
- ae8051601c61: 打包的容器ID,可用docker ps -a 查看
- mypartdb:v1 : 新的镜像的名字,后续导入之后也是这个名字

sudo docker save mypartdb:v1 > myimage.tar // 直接打包成镜像(全部数据) 参数说明
mypartdb:v1 : 要打包的镜像名字
myimage.tar : 压缩之后的名字
注意:要把这个这个工作文件一起导出,也就是整个part-db文件一起打包出去,因为里面db这个文件夹存放的就是数据库文件,所以一起打包就好了。

(2)docker容器导入
打开新的电脑,然后将刚才的东西导入进去,结果如下,我这新的电脑(虚拟机)没有任何镜像和容器:
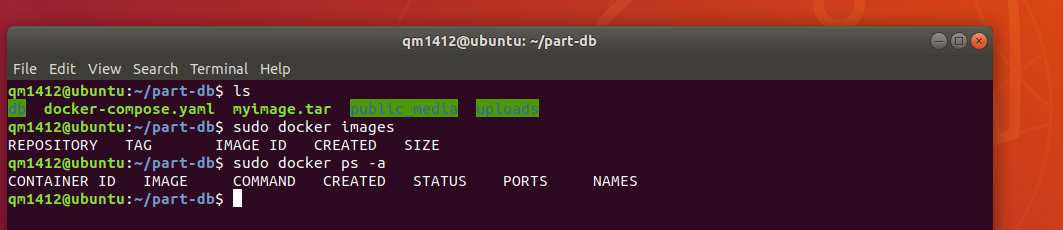
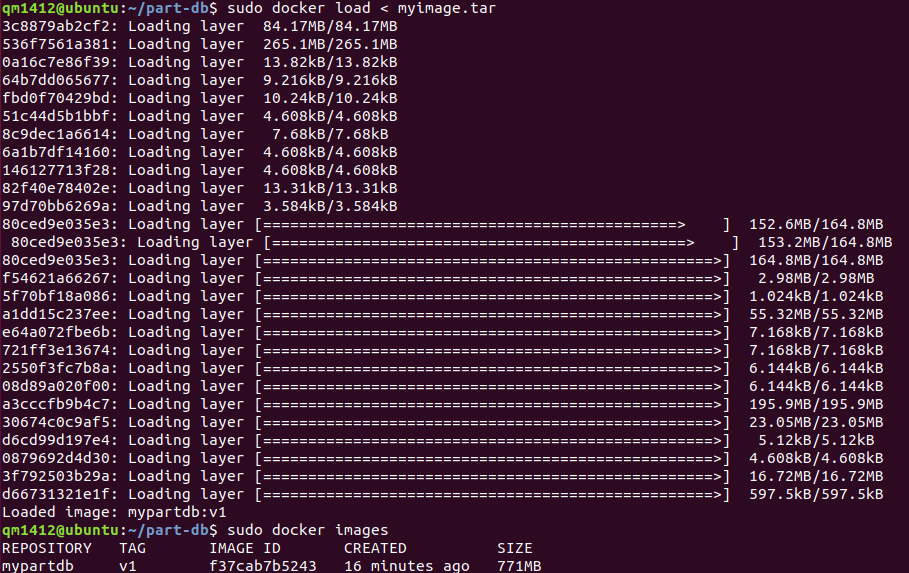
将压缩包打包到新的环境中,执行之后用 docker images 查看一下就会出现一个mypartdb:v1 镜像名字,这样就导入成功了
sudo docker load < myimage.tar # 导入镜像 sudo docker images # 查看镜像
(3)part-db运行
在新的环境中运行之前保存的part-db,具体操作如下:
- 编辑
docker-compose.yaml
这里有个关键的就是docker有个启动顺序而言,也就是说要用yaml配置文件启动不同的服务,那么要修改的就一点image 这个参数要修改成新导入的镜像,否则又是新拉取的数据
touch docker-compose.yaml # 这是配置文件 # image: mypartdb:v1 # 这个一定要修改,不然不会执行成功的

- 启动容器
现在有了配置文件,那么就通过docker-compose来启动容器
sudo docker-compose up -d 然后控制台就会出现一个part-db的容器创建成功,然后用docker ps查看一下就好了

# 进入容器 docker exec -it --user=www-data partdb /bin/bash # 在容器内执行 php bin/console doctrine:migrations:migrate # 这个你可以多次执行,反正初始化之后就会弹出你已经初始化完成了

- 出现以上结果说明已经存在数据库了,最后查看结果,在浏览器访问 http://localhost:8080 :
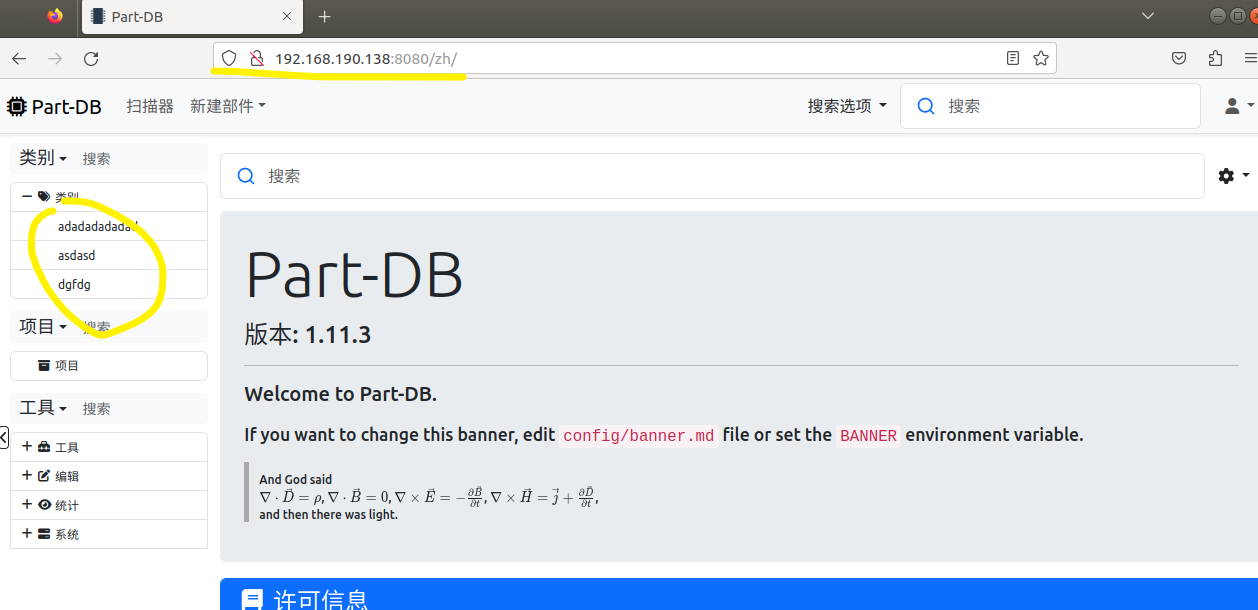
最后成功将容器进行转移,这样就不怕数据丢失了。
3. 一些bug
- 如果碰到docker启动了,然后
docker ps也有进程,但是访问不到网页,所以可以选择重启一下docker 服务
systemctl restart docker ERROR: Couldn't connect to Docker daemon at http+docker://localunixsocket - is it running?
出现这个问题,可以在命令前面加一个sudo,就是权限不够导致的,大部分都是这个权限问题


![洛谷 P11345 [KTSC 2023 R2] 基地简化 题解](http://www.itfaba.com/wp-content/themes/kemi/timthumb.php?src=http://www.itfaba.com/wp-content/themes/kemi/img/random/2.jpg&w=218&h=124&zc=1)
