
前言
对于.NET开发者而言,入门OpenCV的一个很舒适的方式就是先去使用OpenCVSharp,它是 OpenCV 的 .NET 封装,而且作者还开源了一个示例库,可以通过示例库进行入门学习。
OpenCVSharp仓库地址:https://github.com/shimat/opencvsharp
opencvsharp_samples仓库地址:https://github.com/shimat/opencvsharp_samples
作者提供了几十个可以直接运行的示例代码,一开始可以先大概运行一下这些示例,看一下用这个库可以实现哪些功能。
入门第一步就是先学会用,那些视觉算法的原理可以先不懂,大概了解一下就够了,等后面真的需要你深入了解的时候再去了解也不迟,现在深入理解原理容易让小白放弃,刚开始入门我们就当一名踏踏实实的“掉包侠”。
Aruco 标记检测与透视变换
第一个例子是关于Aruco 标记检测和透视变换的。
第一步先运行起来,看一下实现了什么效果?
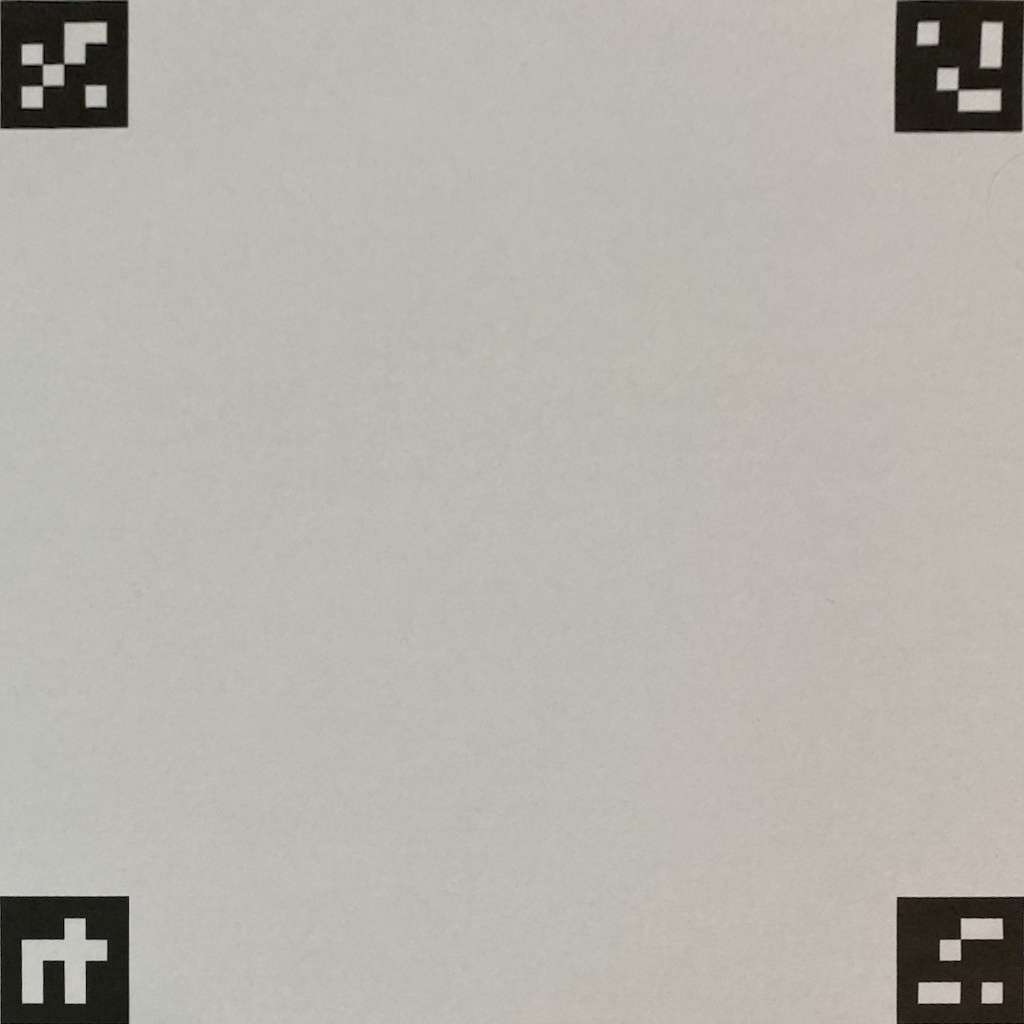
首先原图是这样的:
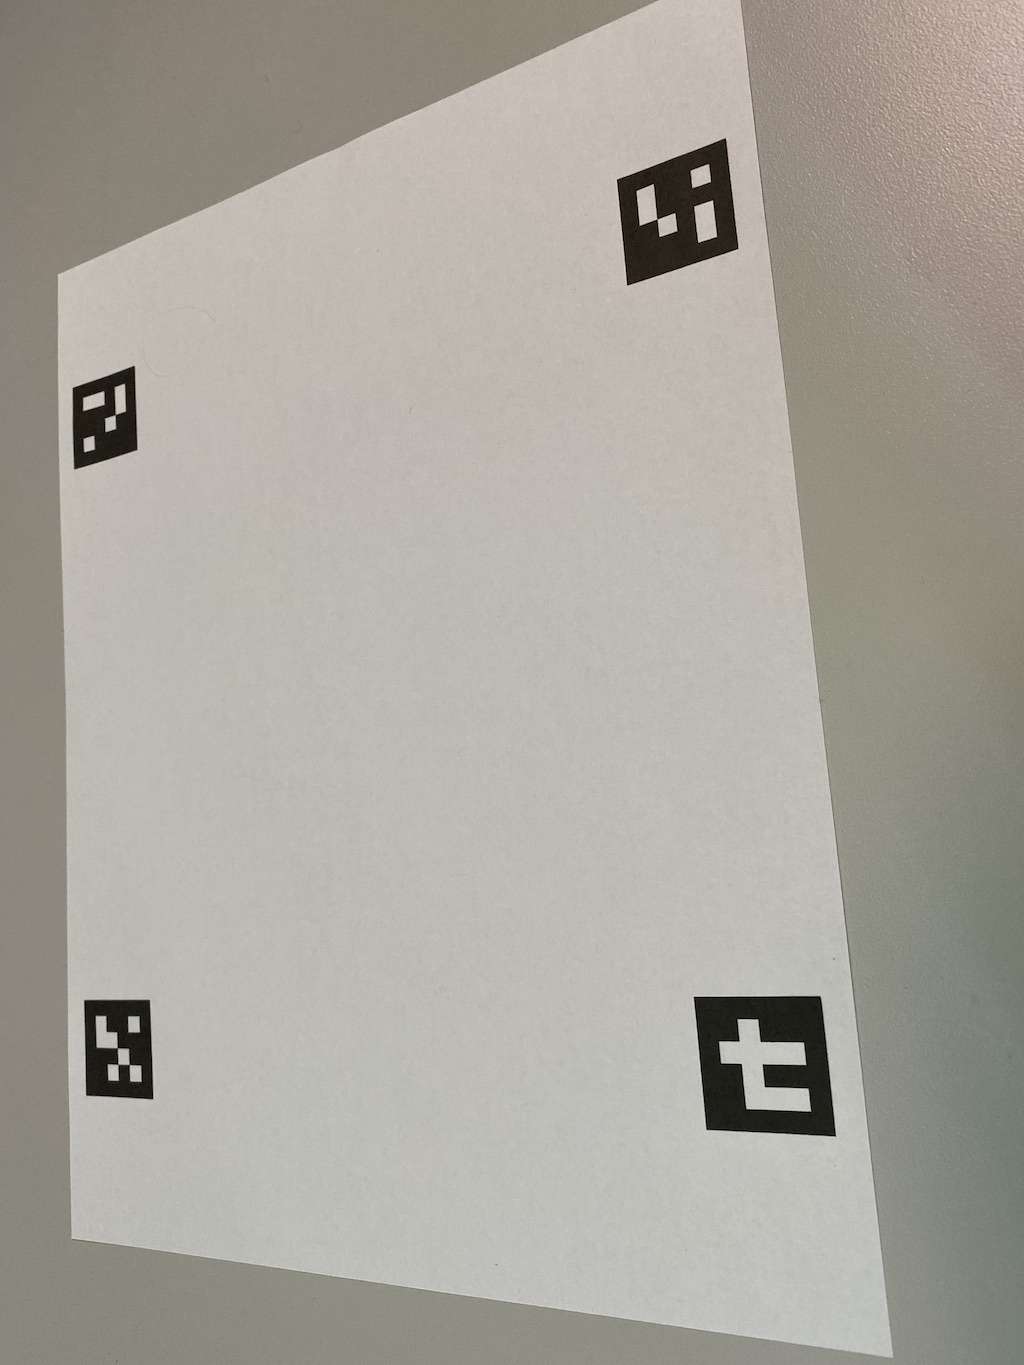
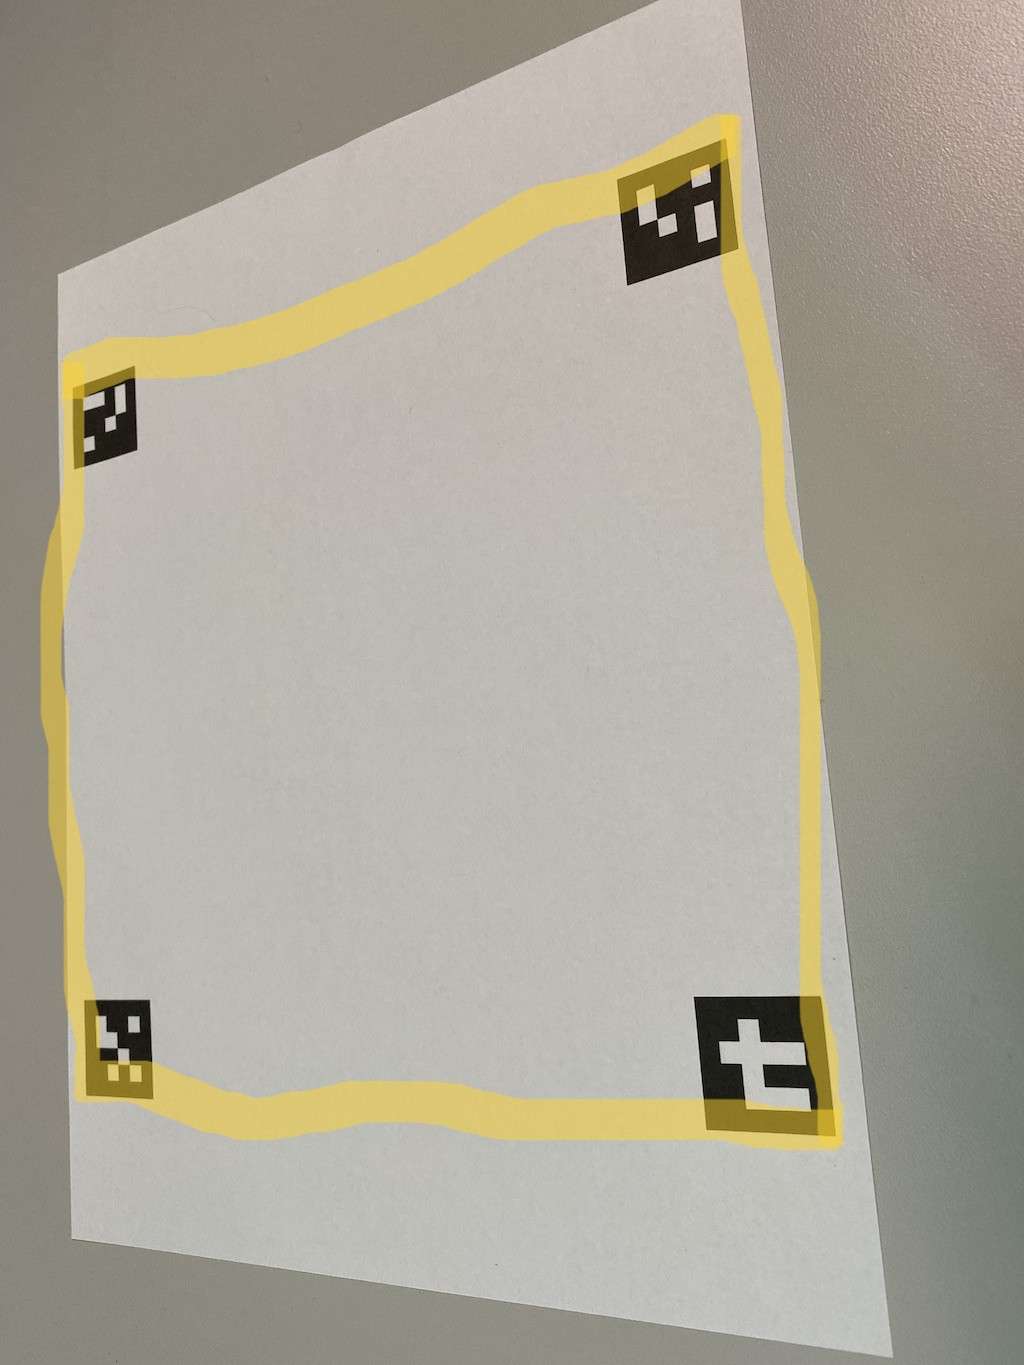
注意到上面有4个有点奇怪的四边形。
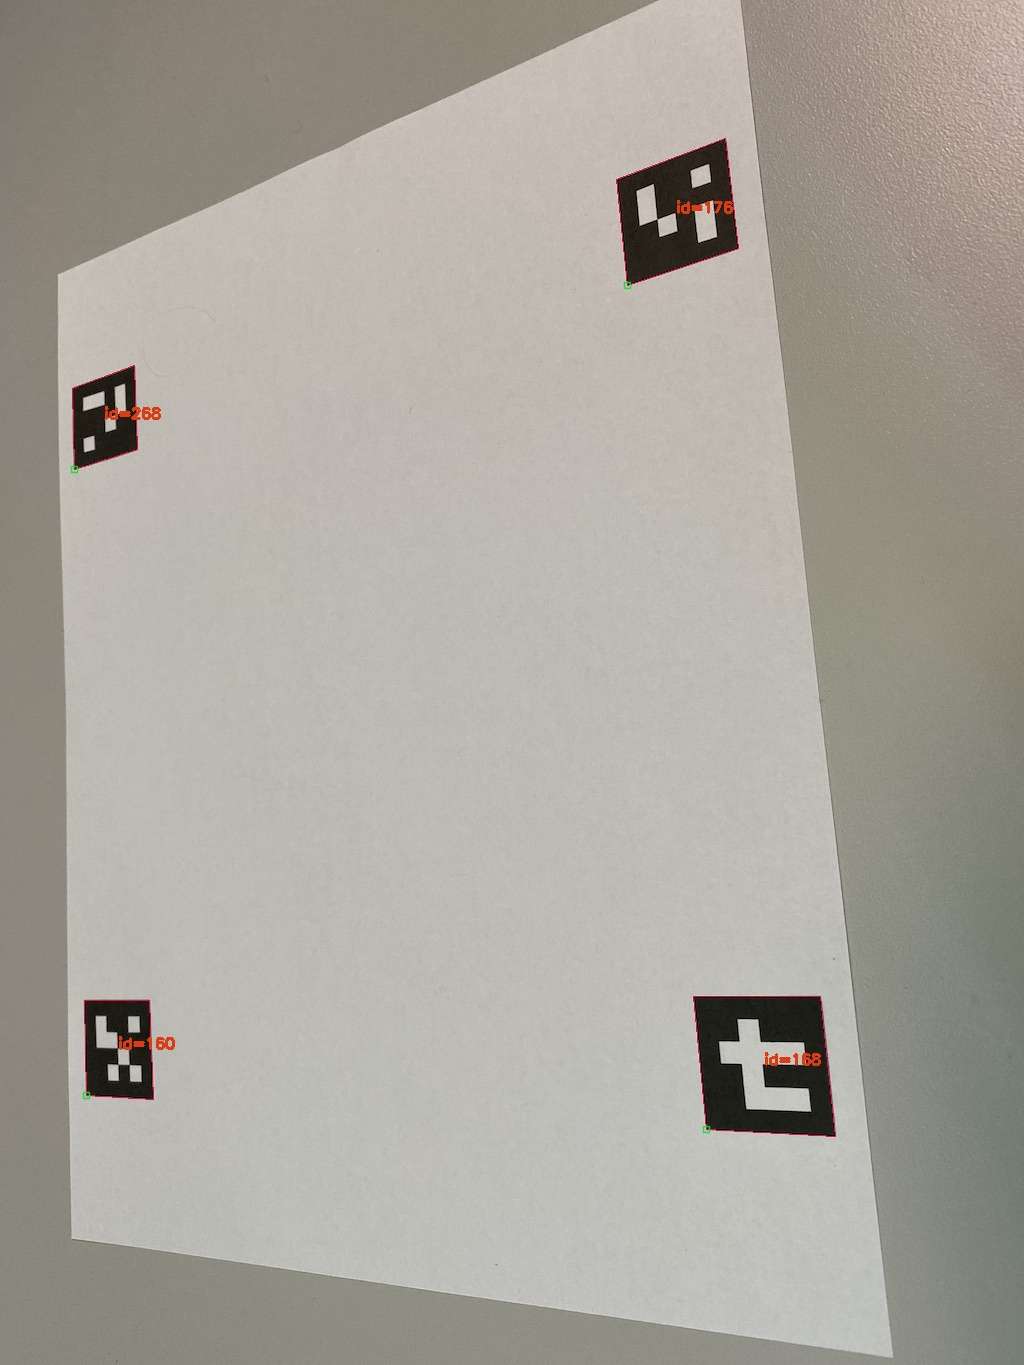
然后识别这几个四边形的区域:
然后再进行一下透视变换:
刚刚看到的这些四边形就是Aruco标记,它是拿来干嘛的呢?我的简单理解就是拿来标记用的,一个经典的应用就是替换相框中的图片。
OpenCVSharp好像还没有提供生成Aruco标记的功能,但是已经有了识别的功能,让我们看看这个效果是如何实现的吧!!
// The locations of the markers in the image at FilePath.Image.Aruco. const int upperLeftMarkerId = 160; const int upperRightMarkerId = 268; const int lowerRightMarkerId = 176; const int lowerLeftMarkerId = 168; using var src = Cv2.ImRead(ImagePath); var detectorParameters = new DetectorParameters(); detectorParameters.CornerRefinementMethod = CornerRefineMethod.Subpix; detectorParameters.CornerRefinementWinSize = 9; using var dictionary = CvAruco.GetPredefinedDictionary(PredefinedDictionaryName.Dict4X4_1000); CvAruco.DetectMarkers(src, dictionary, out var corners, out var ids, detectorParameters, out var rejectedPoints); 每个Aruco标记都有一个确定的ID,然后根据路径读取图片。
var detectorParameters = new DetectorParameters(); detectorParameters.CornerRefinementMethod = CornerRefineMethod.Subpix; detectorParameters.CornerRefinementWinSize = 9; 进行检测器参数配置:
DetectorParameters: 创建ArUco检测器的参数对象,用于控制标记检测的精度和行为
CornerRefinementMethod.Subpix: 设置角点细化方法为子像素级别,提高角点检测精度
CornerRefinementWinSize = 9: 设置角点细化窗口大小为9x9像素,用于角点周围的子像素级优化
using var dictionary = CvAruco.GetPredefinedDictionary(PredefinedDictionaryName.Dict4X4_1000); 进行字典配置:
CvAruco.GetPredefinedDictionary: 获取OpenCV预定义的ArUco标记字典
PredefinedDictionaryName.Dict4X4_1000: 选择4x4位编码、包含1000个不同标记的字典类型
CvAruco.DetectMarkers(src, dictionary, out var corners, out var ids, detectorParameters, out var rejectedPoints); 这就在进行ArUco标记检测了,主要知道一下参数是什么意思就行了。
src - 输入图像,包含要检测ArUco标记的源图像
dictionary - 标记字典,预定义的ArUco标记字典(前面配置的Dict4X4_1000)
corners - 检测到的标记角点(输出参数),每个标记的4个角点坐标,按顺时针顺序存储(从左上角开始)
ids - 检测到的标记ID(输出参数),每个检测到的标记对应的ID编号
detectorParameters - 检测参数,前面配置的检测器参数(包含角点细化等设置)
rejectedPoints - 被拒绝的候选标记(输出参数),检测过程中被识别为候选但最终被拒绝的标记角点
自己再稍微打断点加深一下印象:
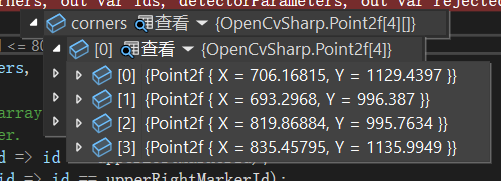
确实是,每一项都有四个点。
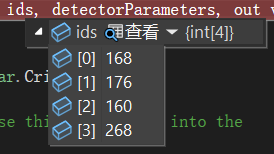
检测出了ArUco标记的ID。
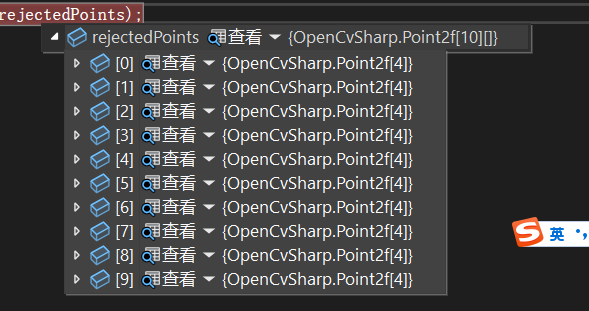
确实有一组被拒绝的候选标记。
using var detectedMarkers = src.Clone(); CvAruco.DrawDetectedMarkers(detectedMarkers, corners, ids, Scalar.Crimson); 在图像上绘制区域与ID。
// Find the index of the four markers in the ids array. We'll use this same index into the // corners array to find the corners of each marker. var upperLeftCornerIndex = Array.FindIndex(ids, id => id == upperLeftMarkerId); var upperRightCornerIndex = Array.FindIndex(ids, id => id == upperRightMarkerId); var lowerRightCornerIndex = Array.FindIndex(ids, id => id == lowerRightMarkerId); var lowerLeftCornerIndex = Array.FindIndex(ids, id => id == lowerLeftMarkerId); // Make sure we found all four markers. if (upperLeftCornerIndex < 0 || upperRightCornerIndex < 0 || lowerRightCornerIndex < 0 || lowerLeftCornerIndex < 0) { return; } // Marker corners are stored clockwise beginning with the upper-left corner. // Get the first (upper-left) corner of the upper-left marker. var upperLeftPixel = corners[upperLeftCornerIndex][0]; // Get the second (upper-right) corner of the upper-right marker. var upperRightPixel = corners[upperRightCornerIndex][1]; // Get the third (lower-right) corner of the lower-right marker. var lowerRightPixel = corners[lowerRightCornerIndex][2]; // Get the fourth (lower-left) corner of the lower-left marker. var lowerLeftPixel = corners[lowerLeftCornerIndex][3]; // Create coordinates for passing to GetPerspectiveTransform var sourceCoordinates = new List<Point2f> { upperLeftPixel, upperRightPixel, lowerRightPixel, lowerLeftPixel }; 就是确保都找到了这些ID,然后确定了一个区域,就是这么一个区域:
这个区域由第一个ArUco标记的左上角点、第二个右上角点、第三个左下角点与第四个右下角点组成。
var destinationCoordinates = new List<Point2f> { new Point2f(0, 0), new Point2f(1024, 0), new Point2f(1024, 1024), new Point2f(0, 1024), }; 首先进行目标坐标定义,定义了变换后的标准矩形区域,创建一个1024×1024像素的正方形。
using var transform = Cv2.GetPerspectiveTransform(sourceCoordinates, destinationCoordinates); 然后进行计算透视变换矩阵:
sourceCoordinates: 从检测到的4个ArUco标记角点提取的源坐标
destinationCoordinates: 目标标准矩形坐标
返回值: 3×3的透视变换矩阵,用于将源四边形映射到目标矩形
using var normalizedImage = new Mat(); Cv2.WarpPerspective(src, normalizedImage, transform, new Size(1024, 1024)); 应用透视变换:
src: 原始输入图像
normalizedImage: 输出的标准化图像
transform: 透视变换矩阵
new Size(1024, 1024): 输出图像尺寸
这样就得到了最后的那张图片。


