
视频演示
大家好,这里是Coding茶水间。
今天我来分享一个基于深度学习的图像增强系统,主要使用开源的Zero-DCE模型。
这个系统可以帮助我们将曝光不足的暗淡图片处理成曝光正常的清晰图像。
下面我将详细介绍这个系统的原理、演示效果、代码实现以及训练方法。
如果你感兴趣,欢迎点赞、收藏和关注!
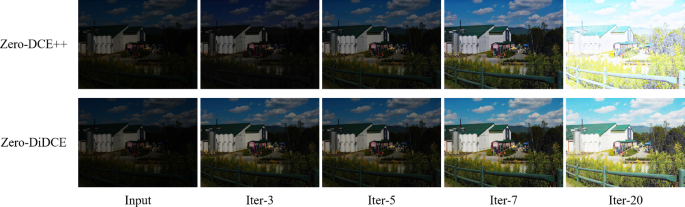
Zero-DCE模型在不同迭代下的图像增强效果对比:
什么是图像增强?
图像增强指的是将曝光不足、暗淡的图片通过算法处理,得到曝光正常、细节清晰的图像。
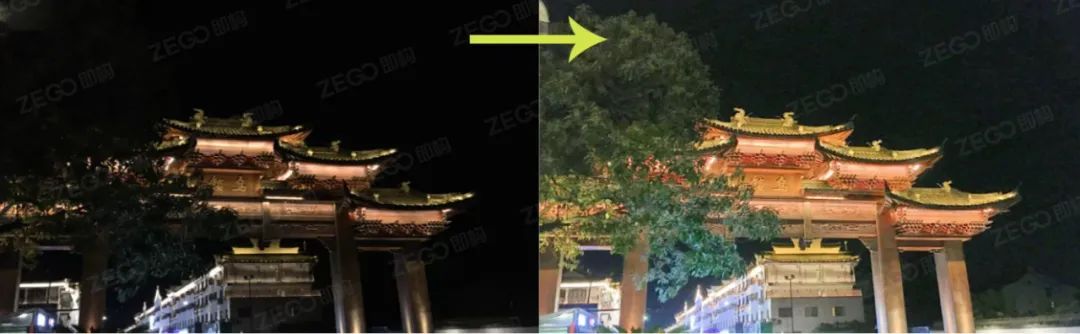
例如,一张夜晚拍摄的照片,可能因为光线不足而看起来很模糊,经过增强后,就能看到更多细节,如绿植、房屋等。
这个系统基于GitHub上的开源项目Zero-DCE模型。
这是一个几年前比较火的低光照图像增强模型。其核心思想是将图像增强抽象成一个增强曲线来进行训练,而不需要成对的低曝光和高曝光图像作为参考。
这就是为什么它叫“Zero-Reference”(零参考),不需要依赖参考图像进行训练,这是一个很大的优点。
Zero-DCE开源地址:
演示效果
让我们来看一些演示效果。系统处理速度很快,只需几秒钟就能输出结果。
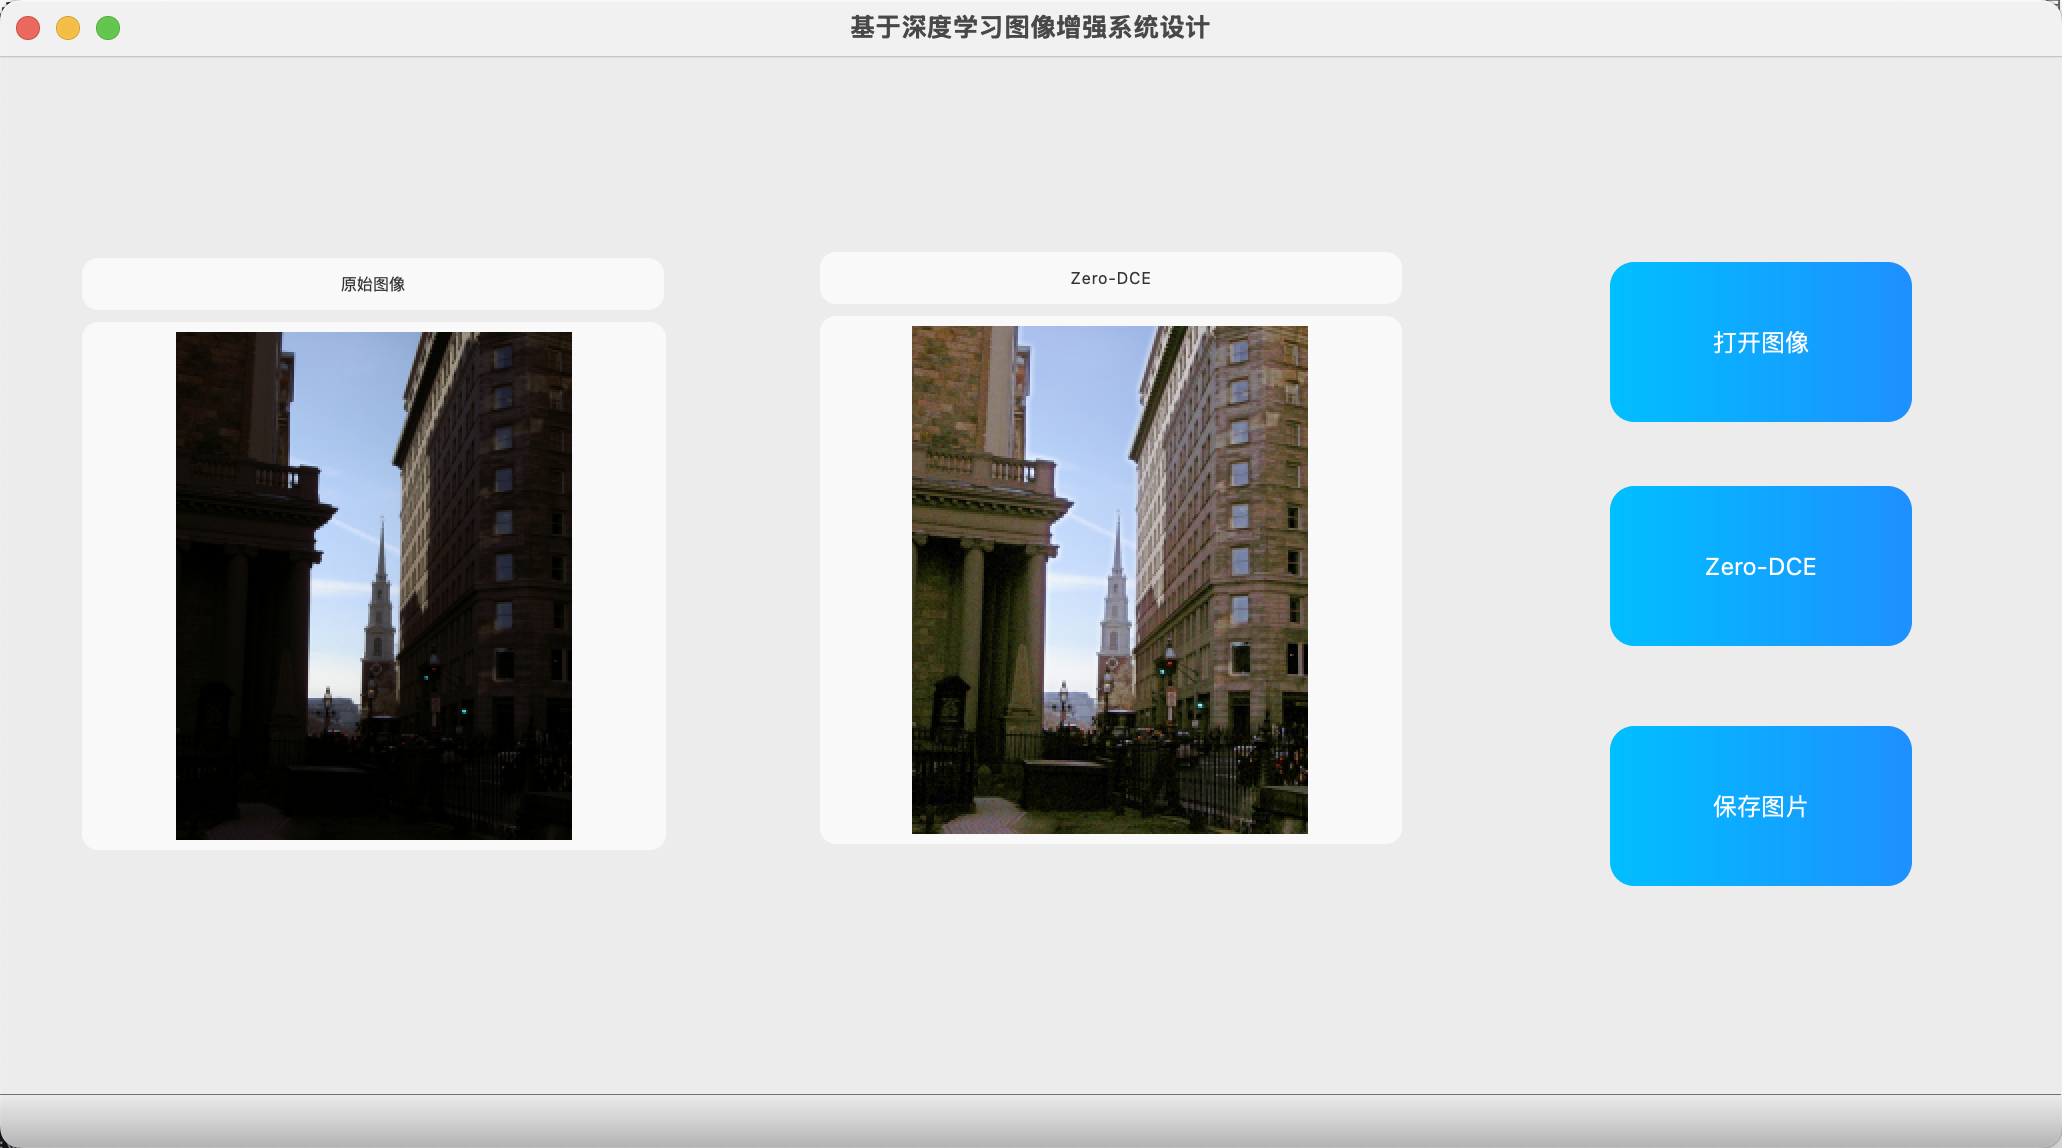
- 国外街道示例:左侧是原图,暗淡无光;经过处理后,右侧得到曝光正常的图片,细节更丰富。
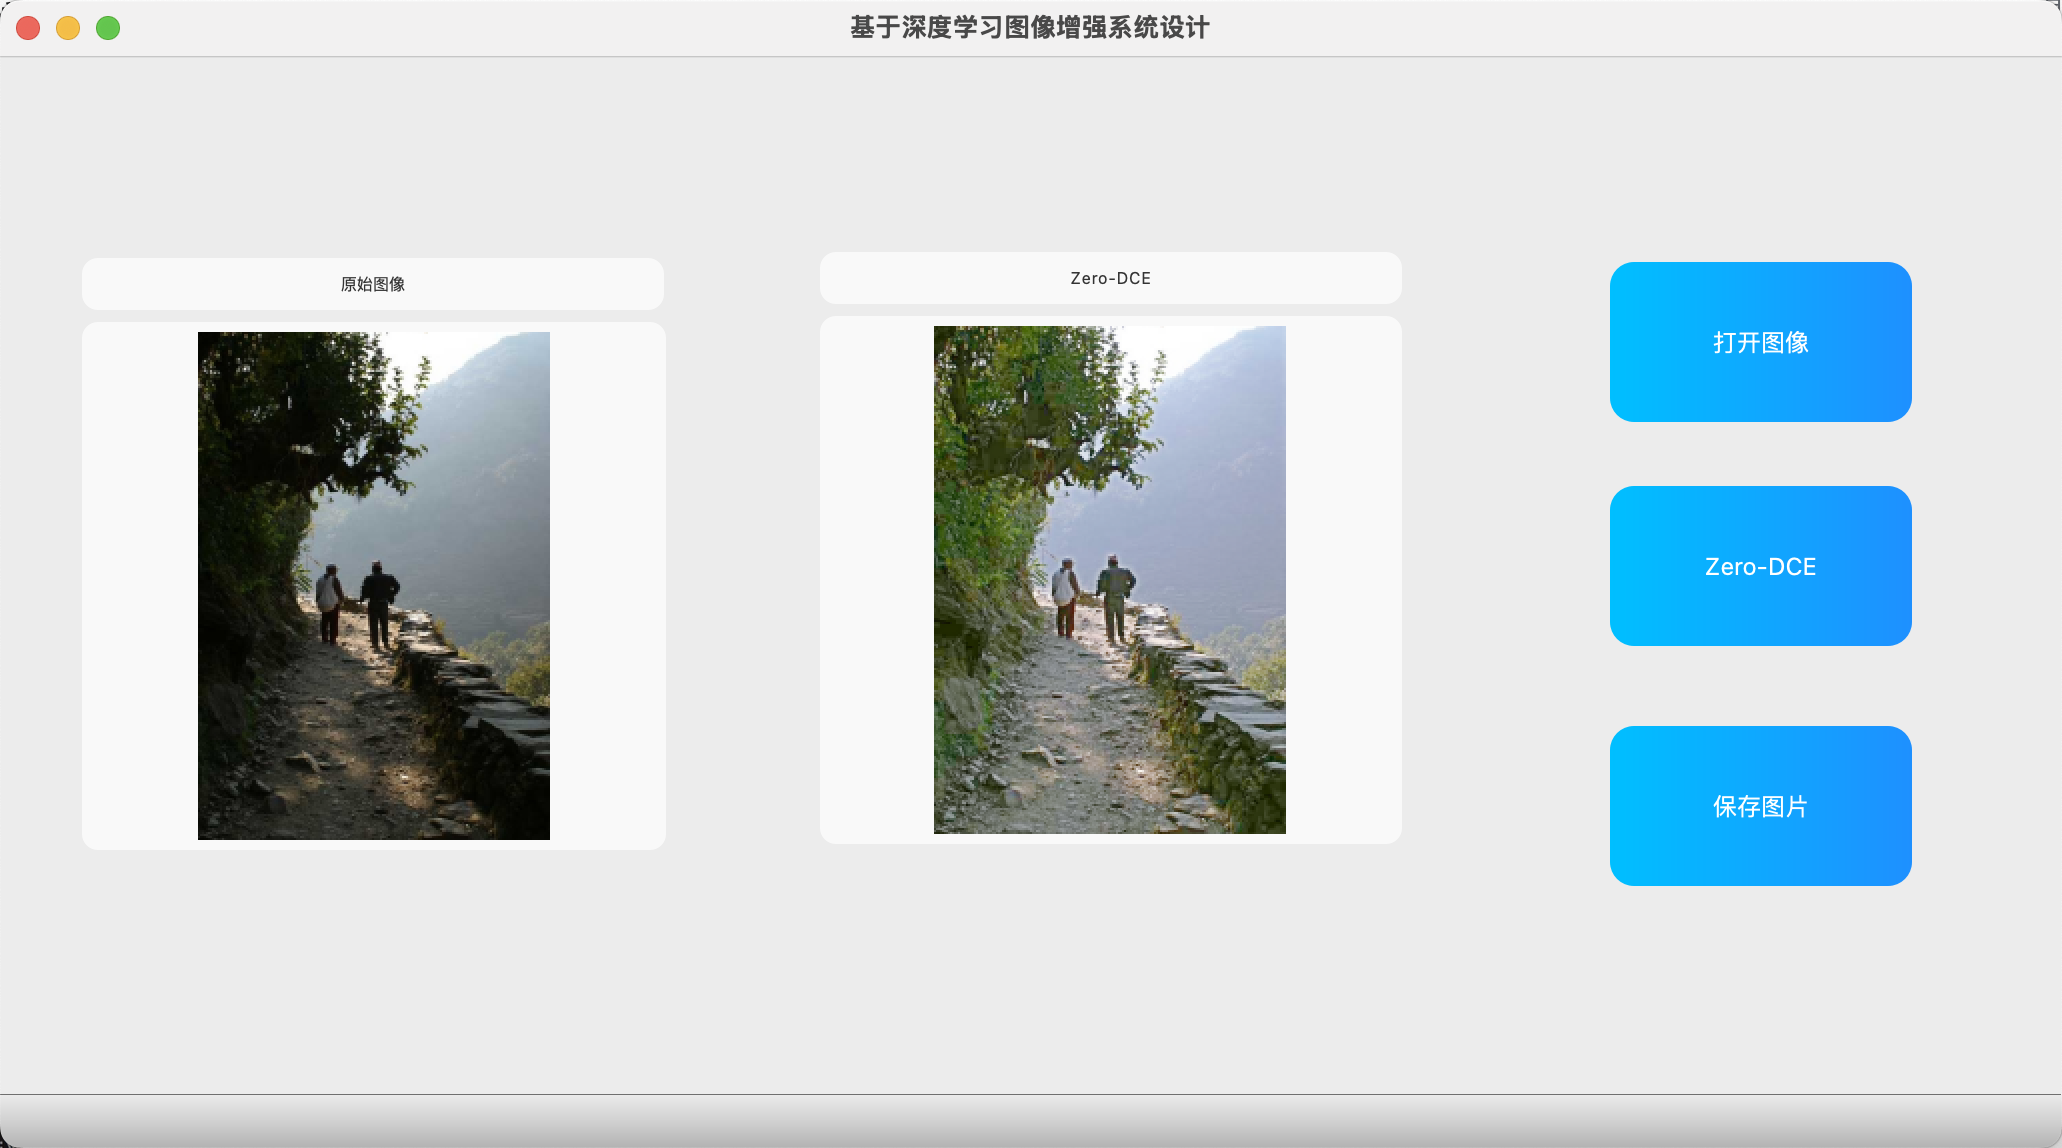
- 野外景色示例:原图中绿植模糊不清,增强后一下子看得非常清楚。
- 夜晚图像示例:如月球上的图片或小房屋,原图几乎漆黑,增强后变得清晰明亮。
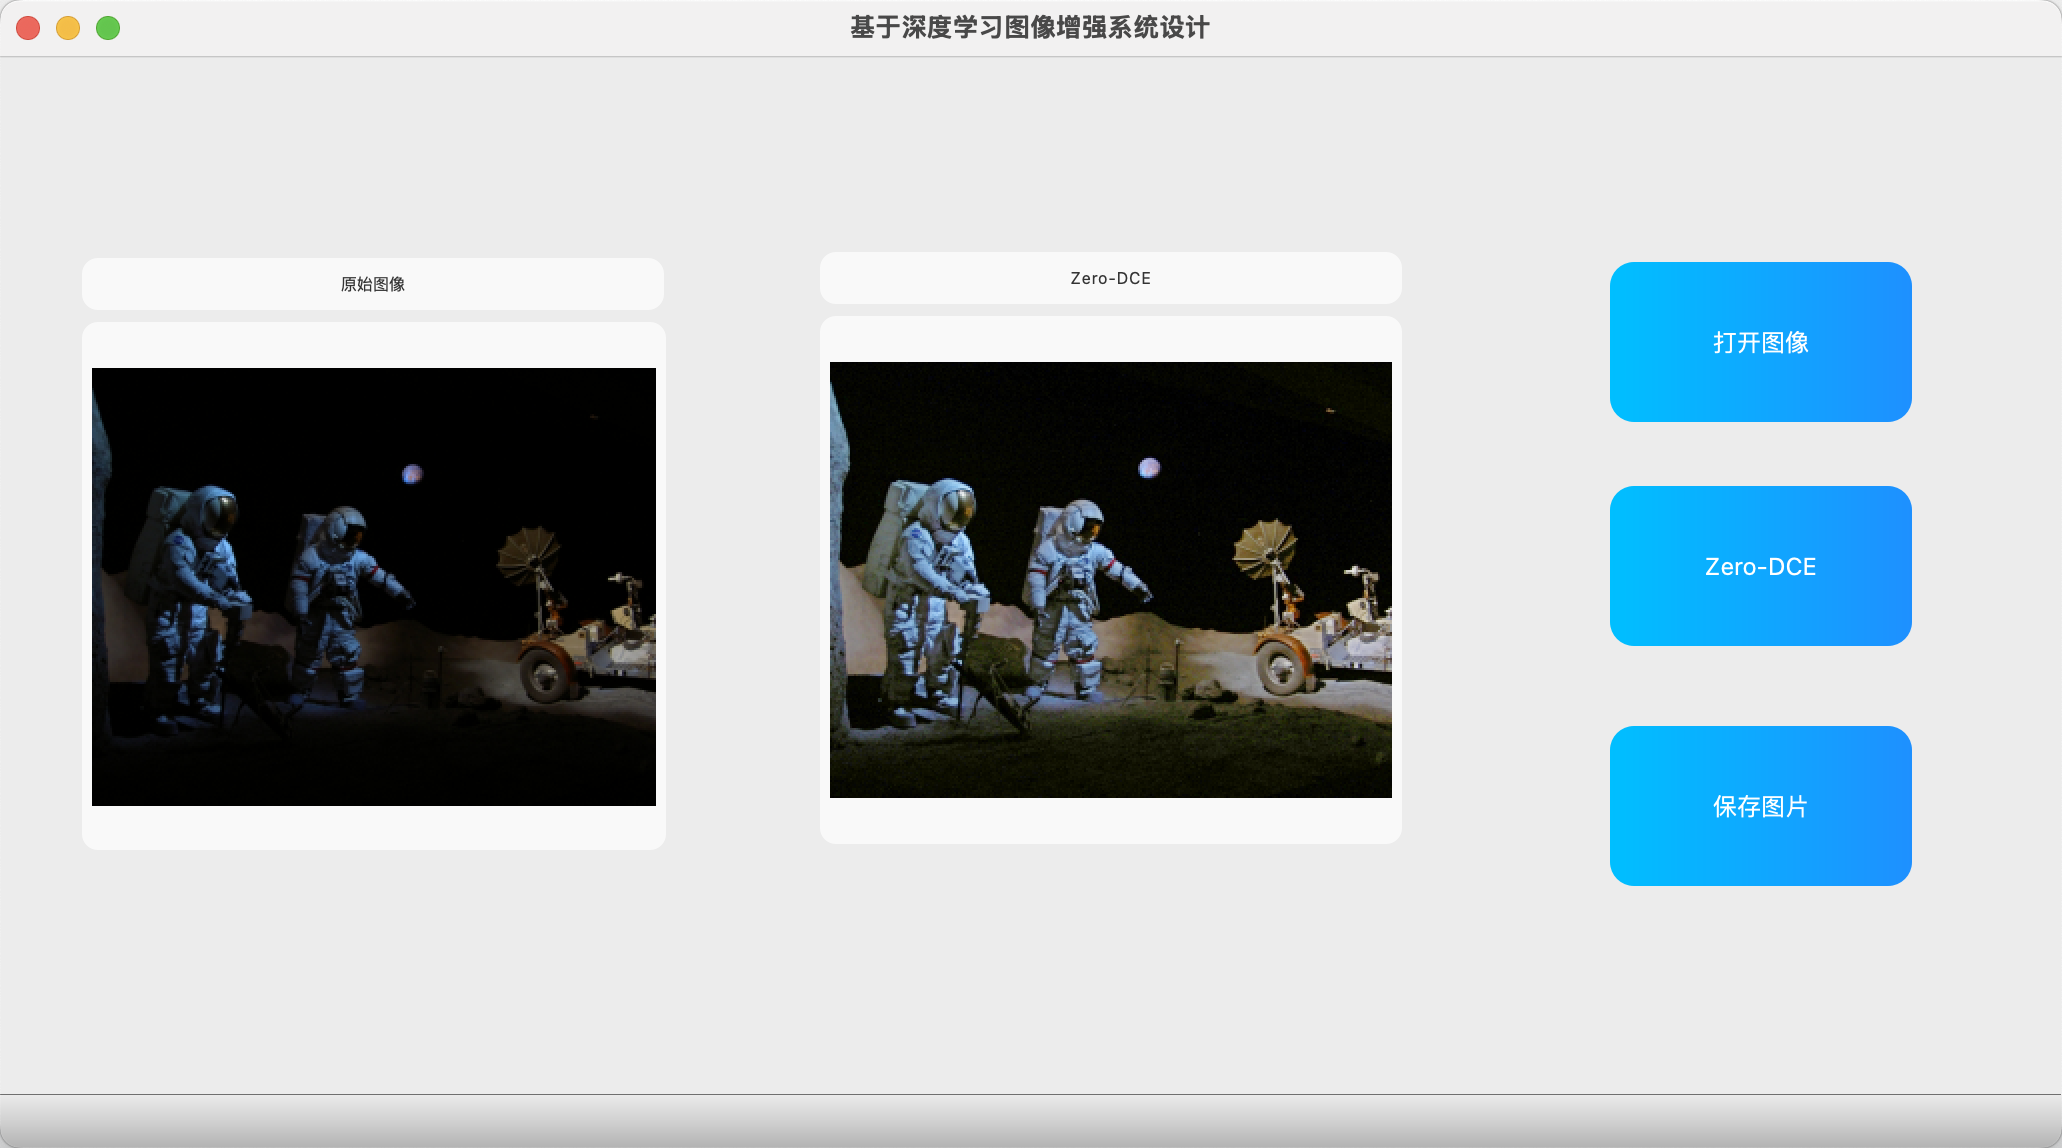
这些效果是通过PyQt5界面封装的,你可以直接打开图片,进行增强处理,并保存结果。
我已经将模型和界面打包在一起,方便使用。
代码实现
下面是完整的代码实现。这是一个使用PyQt5构建的GUI应用,集成了Zero-DCE模型。代码包括图像加载、模型推理、结果显示和保存功能。
python
from datetime import datetime import math import sys from shibie import Ui_MainWindow from PyQt5.QtWidgets import * from PyQt5 import QtCore, QtGui, QtWidgets from PyQt5.QtCore import * from PyQt5.QtGui import * import cv2 as cv import numpy as np import os import time import matplotlib.pyplot as plt import torch import torch.nn as nn from torchvision import transforms from PIL import Image import model class ImageProcess(QMainWindow, Ui_MainWindow): def __init__(self, parent=None): super(ImageProcess, self).__init__() self.setupUi(self) self.device = torch.device('cuda' if torch.cuda.is_available() else 'cpu') # 3. 加载模型 self.DCE_net = model.enhance_net_nopool().to(self.device) self.DCE_net.load_state_dict(torch.load('snapshots/Epoch99.pth', map_location=self.device)) self.DCE_net.eval() def paintEvent(self, event): painter = QPainter(self) pixmap = QPixmap("main_background.jpg") # 加载背景图片 painter.drawPixmap(self.rect(), pixmap) # 将图片拉伸填充整个窗口 painter.end() def cv_imread(self,filePath): cv_img = cv.imdecode(np.fromfile(filePath, dtype=np.uint8), -1) return cv_img def dakaituxiang(self): filename, _ = QFileDialog.getOpenFileName(self, '打开图片') if filename: # self.captured = cv.imdecode(np.fromfile(filename,dtype=np.uint8),-1) self.captured = self.cv_imread(str(filename)) self.image_path = filename # self.captured = cv.imread(str(filename)) # OpenCV图像以BGR通道存储,显示时需要从BGR转到RGB # self.captured = cv.cvtColor(self.captured, cv.COLOR_BGR2RGB) rows, cols, channels = self.captured.shape bytesPerLine = channels * cols cv_img=cv.cvtColor(self.captured,cv.COLOR_RGB2BGR) QImg = QImage(cv_img.data, cols, rows, bytesPerLine, QImage.Format_RGB888) self.timecha = 0 self.result_tu = self.captured self.axes_yuantu.setPixmap(QPixmap.fromImage(QImg).scaled( self.axes_yuantu.size(), Qt.KeepAspectRatio, Qt.SmoothTransformation)) def btn_save(self): if hasattr(self, 'result_tu') and self.result_tu is not None: filename, _ = QFileDialog.getSaveFileName(self, '保存图片', '', 'Images (*.png *.jpg *.bmp)') if filename: cv.imwrite(filename, cv.cvtColor(self.result_tu, cv.COLOR_RGB2BGR)) QMessageBox.information(self, '提示', '图片保存成功!') else: QMessageBox.warning(self, '警告', '没有可保存的图像!') def btnzero(self): original_img = Image.open(self.image_path).convert('RGB') starttime = time.time() # 2. 图像预处理 transform = transforms.Compose([ transforms.ToTensor(), ]) img_tensor = transform(original_img).unsqueeze(0).to(self.device) with torch.no_grad(): _, enhanced_img, _ = self.DCE_net(img_tensor) # 后处理 enhanced_img = enhanced_img.squeeze(0).permute(1, 2, 0).cpu().numpy() enhanced_img = np.clip(enhanced_img * 255, 0, 255).astype(np.uint8) enhanced_img = Image.fromarray(enhanced_img) enhanced_img = np.array(enhanced_img) # 直接转 NumPy 数组 enhanced_img = cv.cvtColor(enhanced_img, cv.COLOR_RGB2BGR) enhanced_img = cv.cvtColor(enhanced_img, cv.COLOR_BGR2RGB) endtime = time.time() timecha = (endtime - starttime) * 1000 timecha = round(timecha, 2) self.timecha = timecha self.result_tu = enhanced_img # 8. 显示结果 cv_img = enhanced_img rows, cols, channels = enhanced_img.shape bytesPerLine = channels * cols QImg = QImage(cv_img.data, cols, rows,bytesPerLine, QImage.Format_RGB888) # 显示在GUI的axes_quzao区域(可根据需要修改为其他QLabel) self.axes_bianyuan_2.setPixmap(QPixmap.fromImage(QImg).scaled( self.axes_bianyuan_2.size(), Qt.KeepAspectRatio, Qt.SmoothTransformation)) return if __name__ == '__main__': app = QApplication(sys.argv) window = ImageProcess() window.show() sys.exit(app.exec_()) ![]()


![洛谷 P11345 [KTSC 2023 R2] 基地简化 题解](http://www.itfaba.com/wp-content/themes/kemi/timthumb.php?src=http://www.itfaba.com/wp-content/themes/kemi/img/random/3.jpg&w=218&h=124&zc=1)
