
记一次全栈开发
目录
概述
企业官网是公司的数字门面,不仅展示公司形象,还承载着品牌传播、产品展示、客户沟通等多种功能,我身为一名全栈开发又是公司的董事长必须自己开发
现在让我们开始吧,程序代码全部手敲耗时20小时,希望大家可以给各位开发者带来帮助
核心功能需求
- 公司简介与品牌展示
- 产品与服务介绍
- 成功案例展示
- 新闻动态发布
- 团队介绍
- 联系方式
- 后台内容管理系统
技术栈选择
前端技术栈
| 技术 | 版本 | 用途 |
|---|---|---|
| Vue.js | 3.x | 前端框架 |
| Vite | 4.x | 构建工具 |
| Vue Router | 4.x | 路由管理 |
| Pinia | 2.x | 状态管理 |
| Element Plus | 2.x | UI组件库 |
| TypeScript | 4.x | 类型系统 |
| SCSS | - | CSS预处理器 |
后端技术栈
| 技术 | 版本 | 用途 |
|---|---|---|
| Node.js | 16.x | 运行环境 |
| Express | 4.x | Web框架 |
| MongoDB | 4.4 | 数据库 |
| Mongoose | 6.x | ODM工具 |
| JWT | - | 身份认证 |
| Multer | - | 文件上传 |
前端开发
项目结构
jishun-website/ ├── public/ # 静态资源 ├── src/ │ ├── assets/ # 资源文件 │ ├── components/ # 组件 │ │ ├── common/ # 通用组件 │ │ └── business/ # 业务组件 │ ├── directives/ # 自定义指令 │ ├── router/ # 路由配置 │ ├── services/ # API服务 │ ├── stores/ # 状态管理 │ ├── views/ # 页面视图 │ ├── App.vue # 根组件 │ └── main.ts # 入口文件 ├── .env # 环境变量 ├── index.html # HTML模板 ├── package.json # 项目依赖 ├── tsconfig.json # TypeScript配置 └── vite.config.ts # Vite配置 关键实现
响应式设计
使用媒体查询和弹性布局实现全设备适配:
// 断点变量 $breakpoints: ( 'sm': 576px, 'md': 768px, 'lg': 992px, 'xl': 1200px, 'xxl': 1400px ); // 响应式混合宏 @mixin respond-to($breakpoint) { $value: map-get($breakpoints, $breakpoint); @if $value { @media (min-width: $value) { @content; } } @else { @error "Unknown breakpoint: #{$breakpoint}"; } } .container { width: 100%; padding: 0 15px; @include respond-to('md') { max-width: 720px; margin: 0 auto; } @include respond-to('lg') { max-width: 960px; } @include respond-to('xl') { max-width: 1140px; } } 组件化开发
基于Vue 3组合式API实现高复用性组件:
// src/components/common/ImageCarousel.vue <script setup lang="ts"> import { ref, onMounted, watch } from 'vue'; interface Props { images: string[]; autoplay?: boolean; interval?: number; } const props = withDefaults(defineProps<Props>(), { autoplay: true, interval: 3000 }); const currentIndex = ref(0); const timer = ref<number | null>(null); const next = () => { currentIndex.value = (currentIndex.value + 1) % props.images.length; }; const prev = () => { currentIndex.value = (currentIndex.value - 1 + props.images.length) % props.images.length; }; const startAutoplay = () => { if (props.autoplay && props.images.length > 1) { timer.value = window.setInterval(() => { next(); }, props.interval); } }; const stopAutoplay = () => { if (timer.value) { clearInterval(timer.value); timer.value = null; } }; watch(() => props.images, () => { stopAutoplay(); startAutoplay(); }); onMounted(() => { startAutoplay(); }); defineExpose({ next, prev }); </script> <template> <div class="carousel" @mouseenter="stopAutoplay" @mouseleave="startAutoplay" > <div class="carousel-inner"> <transition-group name="fade"> <div v-for="(image, index) in images" :key="image" class="carousel-item" :class="{ active: index === currentIndex }" > <img :src="image" alt="Carousel image" /> </div> </transition-group> </div> <button class="carousel-control prev" @click="prev"> <span class="icon">❮</span> </button> <button class="carousel-control next" @click="next"> <span class="icon">❯</span> </button> <div class="carousel-indicators"> <button v-for="(_, index) in images" :key="index" class="indicator" :class="{ active: index === currentIndex }" @click="currentIndex = index" ></button> </div> </div> </template> <style scoped lang="scss"> .carousel { position: relative; width: 100%; overflow: hidden; &-inner { position: relative; width: 100%; height: 100%; } &-item { position: absolute; top: 0; left: 0; width: 100%; height: 100%; opacity: 0; transition: opacity 0.5s ease; &.active { opacity: 1; z-index: 1; } img { width: 100%; height: 100%; object-fit: cover; } } .fade-enter-active, .fade-leave-active { transition: opacity 0.5s ease; } .fade-enter-from, .fade-leave-to { opacity: 0; } </style> 状态管理
我使用Pinia进行状态管理:
// src/stores/news.ts import { defineStore } from 'pinia'; import { ref, computed } from 'vue'; import type { NewsItem } from '@/types'; import { fetchNewsList, fetchNewsDetail } from '@/services/api'; export const useNewsStore = defineStore('news', () => { const newsList = ref<NewsItem[]>([]); const currentNews = ref<NewsItem | null>(null); const loading = ref(false); const error = ref<string | null>(null); const latestNews = computed(() => { return [...newsList.value].sort((a, b) => new Date(b.publishDate).getTime() - new Date(a.publishDate).getTime() ).slice(0, 5); }); async function getNewsList() { loading.value = true; error.value = null; try { newsList.value = await fetchNewsList(); } catch (err) { error.value = err instanceof Error ? err.message : '获取新闻列表失败'; } finally { loading.value = false; } } async function getNewsDetail(id: string) { loading.value = true; error.value = null; try { currentNews.value = await fetchNewsDetail(id); } catch (err) { error.value = err instanceof Error ? err.message : '获取新闻详情失败'; } finally { loading.value = false; } } return { newsList, currentNews, loading, error, latestNews, getNewsList, getNewsDetail }; }); 后端开发
项目结构
jishun-website-backend/ ├── src/ │ ├── config/ # 配置文件 │ ├── controllers/ # 控制器 │ ├── middlewares/ # 中间件 │ ├── models/ # 数据模型 │ ├── routes/ # 路由定义 │ ├── services/ # 业务逻辑 │ ├── utils/ # 工具函数 │ ├── app.ts # 应用配置 │ └── index.ts # 入口文件 ├── uploads/ # 上传文件目录 ├── .env # 环境变量 ├── package.json # 项目依赖 └── tsconfig.json # TypeScript配置 关键实现
数据模型设计
使用Mongoose定义数据模型:
// src/models/News.ts import mongoose, { Schema, Document } from 'mongoose'; export interface INews extends Document { title: string; content: string; summary: string; coverImage: string; publishDate: Date; author: string; tags: string[]; isPublished: boolean; viewCount: number; createdAt: Date; updatedAt: Date; } const NewsSchema: Schema = new Schema({ title: { type: String, required: true, trim: true }, content: { type: String, required: true }, summary: { type: String, required: true, trim: true }, coverImage: { type: String, required: true }, publishDate: { type: Date, default: Date.now }, author: { type: String, required: true }, tags: [{ type: String, trim: true }], isPublished: { type: Boolean, default: false }, viewCount: { type: Number, default: 0 } }, { timestamps: true }); // 添加全文搜索索引 NewsSchema.index({ title: 'text', content: 'text', summary: 'text', tags: 'text' }); export default mongoose.model<INews>('News', NewsSchema); API路由设计
RESTful API设计:
// src/routes/news.ts import express from 'express'; import { getAllNews, getNewsById, createNews, updateNews, deleteNews, searchNews } from '../controllers/newsController'; import { authenticate, authorize } from '../middlewares/auth'; import { validateNewsInput } from '../middlewares/validation'; const router = express.Router(); // 公开路由 router.get('/', getAllNews); router.get('/search', searchNews); router.get('/:id', getNewsById); // 需要认证的路由 router.post('/', authenticate, authorize(['admin', 'editor']), validateNewsInput, createNews); router.put('/:id', authenticate, authorize(['admin', 'editor']), validateNewsInput, updateNews); router.delete('/:id', authenticate, authorize(['admin']), deleteNews); export default router; 身份验证中间件
JWT认证实现:
// src/middlewares/auth.ts import { Request, Response, NextFunction } from 'express'; import jwt from 'jsonwebtoken'; import User from '../models/User'; interface DecodedToken { id: string; role: string; } declare global { namespace Express { interface Request { user?: any; } } } export const authenticate = async (req: Request, res: Response, next: NextFunction) => { try { const authHeader = req.headers.authorization; if (!authHeader || !authHeader.startsWith('Bearer ')) { return res.status(401).json({ message: '未提供认证令牌' }); } const token = authHeader.split(' ')[1]; const decoded = jwt.verify(token, process.env.JWT_SECRET as string) as DecodedToken; const user = await User.findById(decoded.id).select('-password'); if (!user) { return res.status(401).json({ message: '用户不存在' }); } req.user = user; next(); } catch (error) { return res.status(401).json({ message: '无效的认证令牌' }); } }; export const authorize = (roles: string[]) => { return (req: Request, res: Response, next: NextFunction) => { if (!req.user) { return res.status(401).json({ message: '未认证的用户' }); } if (!roles.includes(req.user.role)) { return res.status(403).json({ message: '没有权限执行此操作' }); } next(); }; }; 性能优化
前端性能优化
- 代码分割与懒加载
// src/router/index.ts import { createRouter, createWebHistory } from 'vue-router'; const routes = [ { path: '/', component: () => import('../views/Home.vue') }, { path: '/about', component: () => import('../views/About.vue') }, { path: '/news', component: () => import('../views/News.vue') }, { path: '/news/:id', component: () => import('../views/NewsDetail.vue') }, ]; const router = createRouter({ history: createWebHistory(), routes, scrollBehavior(to, from, savedPosition) { if (savedPosition) { return savedPosition; } else { return { top: 0 }; } } }); export default router; - 图片优化
// src/directives/lazyload.ts import { DirectiveBinding } from 'vue'; export default { mounted(el: HTMLImageElement, binding: DirectiveBinding) { const observer = new IntersectionObserver((entries) => { entries.forEach(entry => { if (entry.isIntersecting) { el.src = binding.value; observer.unobserve(el); } }); }); observer.observe(el); } }; // 使用方式 // <img v-lazy="'/path/to/image.jpg'" alt="Lazy loaded image"> - 资源预加载
<!-- index.html --> <head> <!-- 预加载关键资源 --> <link rel="preload" href="/fonts/custom-font.woff2" as="font" type="font/woff2" crossorigin> <link rel="preload" href="/assets/hero-image.webp" as="image"> <!-- 预连接第三方域名 --> <link rel="preconnect" href="https://api.example.com"> <link rel="dns-prefetch" href="https://api.example.com"> </head> 后端性能优化
- 数据库查询优化
// 添加适当的索引 NewsSchema.index({ publishDate: -1 }); NewsSchema.index({ tags: 1 }); // 使用投影只返回需要的字段 const newsList = await News.find({ isPublished: true }) .select('title summary coverImage publishDate author') .sort({ publishDate: -1 }) .limit(10); - API响应缓存
// src/middlewares/cache.ts import { Request, Response, NextFunction } from 'express'; import NodeCache from 'node-cache'; const cache = new NodeCache({ stdTTL: 60 }); // 默认缓存60秒 export const cacheMiddleware = (duration: number = 60) => { return (req: Request, res: Response, next: NextFunction) => { // 只缓存GET请求 if (req.method !== 'GET') { return next(); } const key = `__express__${req.originalUrl || req.url}`; const cachedBody = cache.get(key); if (cachedBody) { res.send(cachedBody); return; } const originalSend = res.send; res.send = function(body): Response { cache.set(key, body, duration); return originalSend.call(this, body); }; next(); }; }; // 使用方式 // app.use('/api/news', cacheMiddleware(300), newsRoutes); 部署流程
宝塔面板部署
1. 安装宝塔面板
# CentOS系统 yum install -y wget && wget -O install.sh http://download.bt.cn/install/install_6.0.sh && sh install.sh # Ubuntu/Debian系统 wget -O install.sh http://download.bt.cn/install/install-ubuntu_6.0.sh && sudo bash install.sh 2. 安装必要软件
通过宝塔面板安装:
- Nginx 1.20
- Node.js 16.x
- MongoDB 4.4
- PM2管理器
3. 前端部署
# 克隆代码库 git clone https://github.com/your-repo/jishun-website.git /www/wwwroot/jishunkeji.cn/jishun-website # 安装依赖并构建 cd /www/wwwroot/jishunkeji.cn/jishun-website npm install npm run build 4. 后端部署
# 克隆代码库 git clone https://github.com/your-repo/jishun-website-backend.git /www/wwwroot/jishunkeji.cn/jishun-website-backend # 安装依赖并构建 cd /www/wwwroot/jishunkeji.cn/jishun-website-backend npm install npm run build # 创建PM2配置文件 cat > ecosystem.config.js << 'EOL' module.exports = { apps: [{ name: "jishun-backend", script: "./dist/index.js", instances: 2, exec_mode: "cluster", env: { NODE_ENV: "production", PORT: 5001 }, max_memory_restart: "300M" }] } EOL # 启动服务 pm2 start ecosystem.config.js 5. Nginx配置
server { listen 80; server_name jishunkeji.cn www.jishunkeji.cn; # 重定向到HTTPS return 301 https://$host$request_uri; } server { listen 443 ssl http2; server_name jishunkeji.cn www.jishunkeji.cn; # SSL配置 ssl_certificate /path/to/cert.pem; ssl_certificate_key /path/to/key.pem; root /www/wwwroot/jishunkeji.cn/jishun-website/dist; index index.html; # 添加正确的MIME类型映射 include /etc/nginx/mime.types; types { application/javascript js mjs ts; application/json json; text/css css; } # JavaScript文件特殊处理 location ~* .(js|mjs|ts)$ { add_header Content-Type application/javascript; try_files $uri =404; } # 静态资源缓存 location ~* .(css|png|jpg|jpeg|gif|ico|svg|woff|woff2|ttf|eot)$ { expires 1y; add_header Cache-Control "public, max-age=31536000, immutable"; } # 启用Gzip压缩 gzip on; gzip_vary on; gzip_proxied any; gzip_comp_level 6; gzip_types text/plain text/css application/json application/javascript text/xml application/xml application/xml+rss text/javascript; # 前端路由支持 location / { try_files $uri $uri/ /index.html; } # 后端API代理 location /api { proxy_pass http://127.0.0.1:5001; proxy_http_version 1.1; proxy_set_header Upgrade $http_upgrade; proxy_set_header Connection 'upgrade'; proxy_set_header Host $host; proxy_set_header X-Real-IP $remote_addr; proxy_cache_bypass $http_upgrade; } # 安全相关头部 add_header X-Content-Type-Options nosniff; add_header X-XSS-Protection "1; mode=block"; add_header X-Frame-Options SAMEORIGIN; add_header Strict-Transport-Security "max-age=31536000; includeSubDomains" always; } 常见问题与解决方案
1. MIME类型配置问题
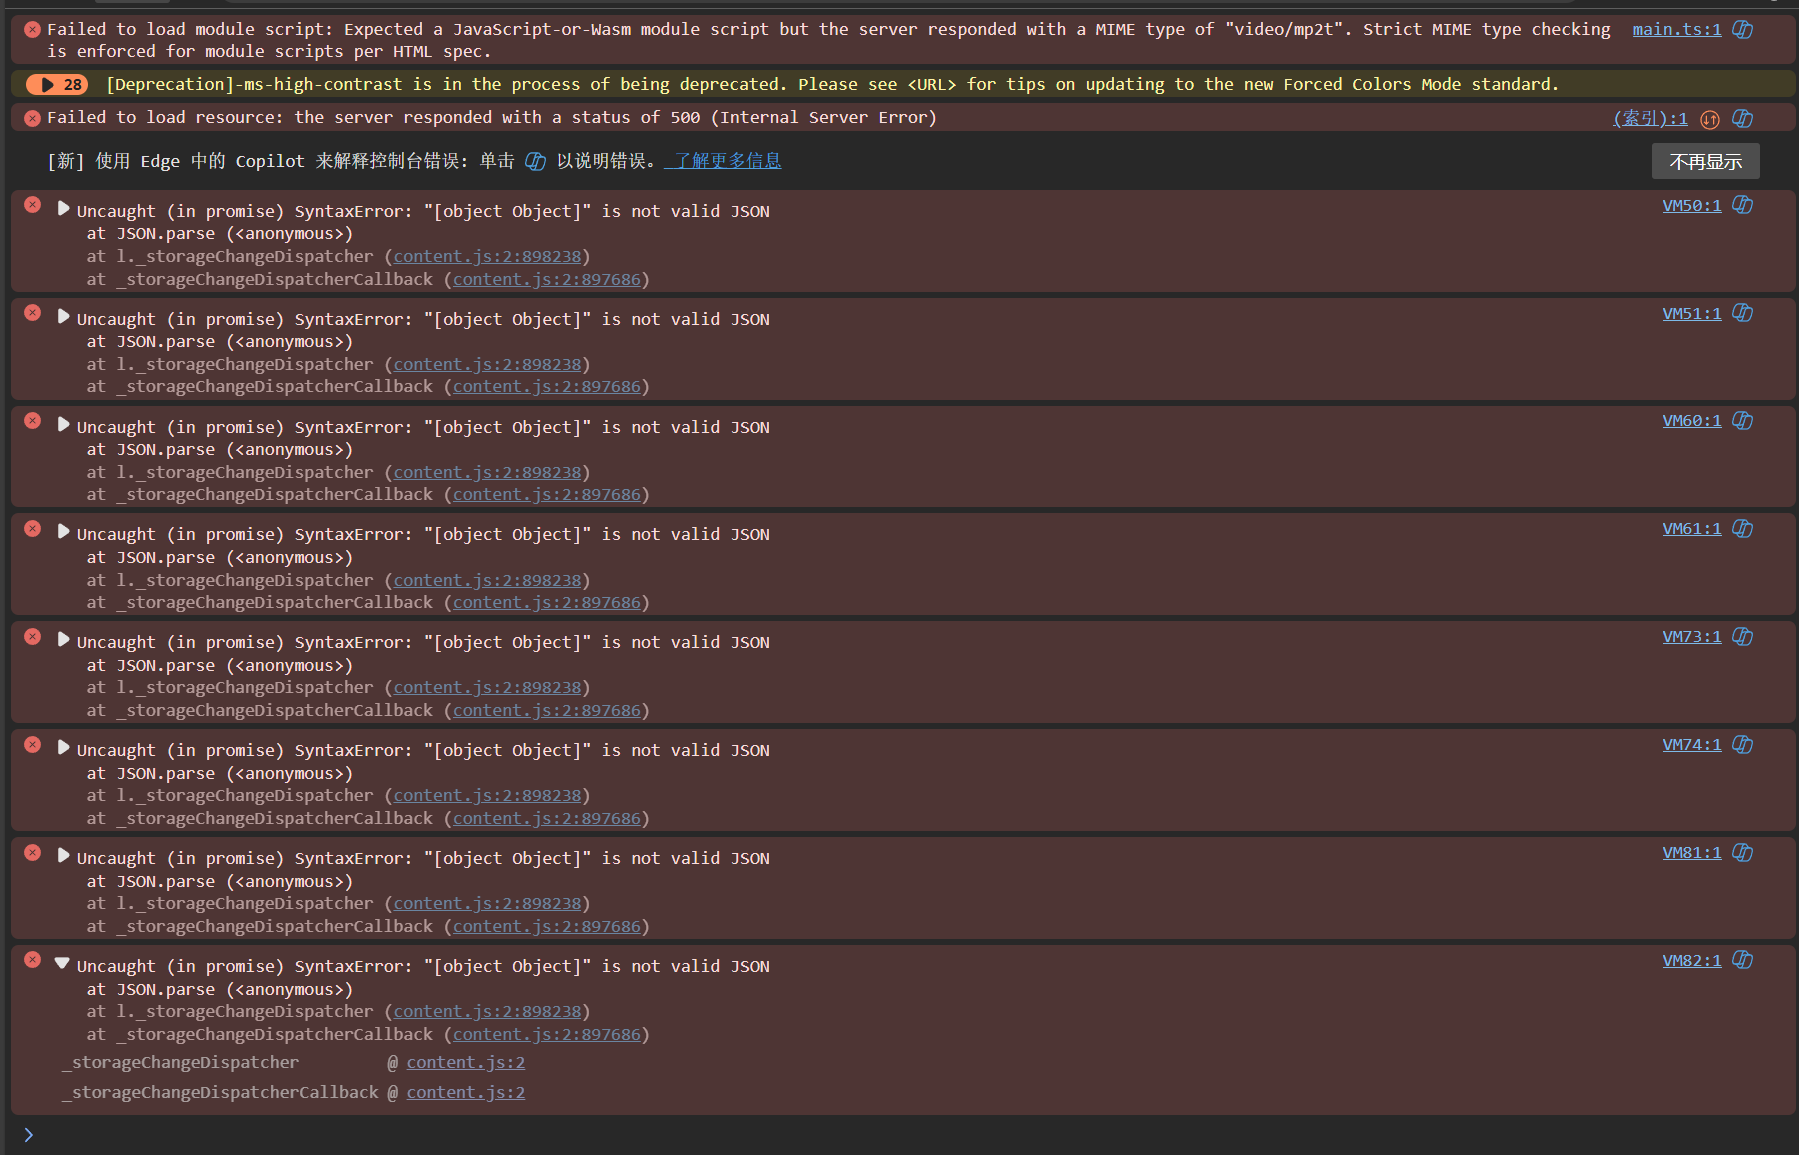
问题:部署后前端页面出现白屏,控制台报错:
Failed to load module script: Expected a JavaScript-or-Wasm module script but the server responded with a MIME type of "video/mp2t". 解决方案:
在Nginx配置中添加正确的MIME类型映射:(这个最坑)
types { application/javascript js mjs ts; application/json json; text/css css; } location ~* .(js|mjs|ts)$ { add_header Content-Type application/javascript; try_files $uri =404; } 上面是方法一
如果不行用方法二这个我搞了2个小时
然后发现是


2. 跨域资源共享(CORS)问题
问题:开发环境正常,生产环境API请求失败,控制台报CORS错误。
解决方案:
在后端添加CORS中间件:
import cors from 'cors'; // 配置CORS app.use(cors({ origin: process.env.NODE_ENV === 'production' ? 'https://jishunkeji.cn' : 'http://localhost:3000', methods: ['GET', 'POST', 'PUT', 'DELETE'], allowedHeaders: ['Content-Type', 'Authorization'] })); 3. 文件上传权限问题
问题:在生产环境中,文件上传失败,服务器日志显示权限错误。
解决方案:
- 检查并修正上传目录的权限:
# 设置正确的目录权限 chown -R www:www /www/wwwroot/jishunkeji.cn/jishun-website-backend/uploads chmod -R 755 /www/wwwroot/jishunkeji.cn/jishun-website-backend/uploads - 在Node.js应用中确保上传目录存在:
import fs from 'fs'; import path from 'path'; const uploadDir = path.join(__dirname, '../uploads'); // 确保上传目录存在 if (!fs.existsSync(uploadDir)) { fs.mkdirSync(uploadDir, { recursive: true }); } 4. PM2启动问题
问题:PM2启动失败,提示"未检测到pm2,请先安装pm2或切换node版本后再试"。
解决方案:
- 确保全局安装PM2:
npm install -g pm2 - 如果使用NVM管理Node.js版本,确保在正确的Node.js版本下安装PM2:
!!!:新版本没有pm2,pm2被默认到了建站的地方
nvm use 16 npm install -g pm2 - 在宝塔面板中,确保选择了正确的Node.js版本。
维护与更新
自动化部署流程
创建简单的部署脚本:
#!/bin/bash # deploy.sh # 前端部署 cd /www/wwwroot/jishunkeji.cn/jishun-website git pull npm install npm run build # 后端部署 cd /www/wwwroot/jishunkeji.cn/jishun-website-backend git pull npm install npm run build pm2 reload jishun-backend 监控与日志
- 使用PM2监控后端服务
# 查看应用状态 pm2 status # 查看日志 pm2 logs jishun-backend # 监控资源使用 pm2 monit - Nginx日志分析
# 安装GoAccess日志分析工具 yum install goaccess # 分析Nginx访问日志 goaccess /var/log/nginx/access.log -o /www/wwwroot/report.html --log-format=COMBINED 数据备份策略
创建MongoDB备份脚本:
#!/bin/bash # backup.sh # 设置变量 BACKUP_DIR="/www/backup/mongodb" DATE=$(date +%Y%m%d_%H%M%S) DB_NAME="jishun_website" # 创建备份目录 mkdir -p $BACKUP_DIR # 执行备份 mongodump --db $DB_NAME --out $BACKUP_DIR/$DATE # 压缩备份 cd $BACKUP_DIR tar -zcvf $DATE.tar.gz $DATE rm -rf $DATE # 删除7天前的备份 find $BACKUP_DIR -name "*.tar.gz" -type f -mtime +7 -delete 添加到crontab定时执行:
# 每天凌晨3点执行备份 0 3 * * * /path/to/backup.sh >> /var/log/mongodb_backup.log 2>&1 本文档详细记录了企业网站的开发与部署流程,从技术选型到最终上线。通过合理的架构设计、性能优化和部署配置,我成功构建了一个高性能、易维护的企业官网系统,希望能给各位开发者帮助吧
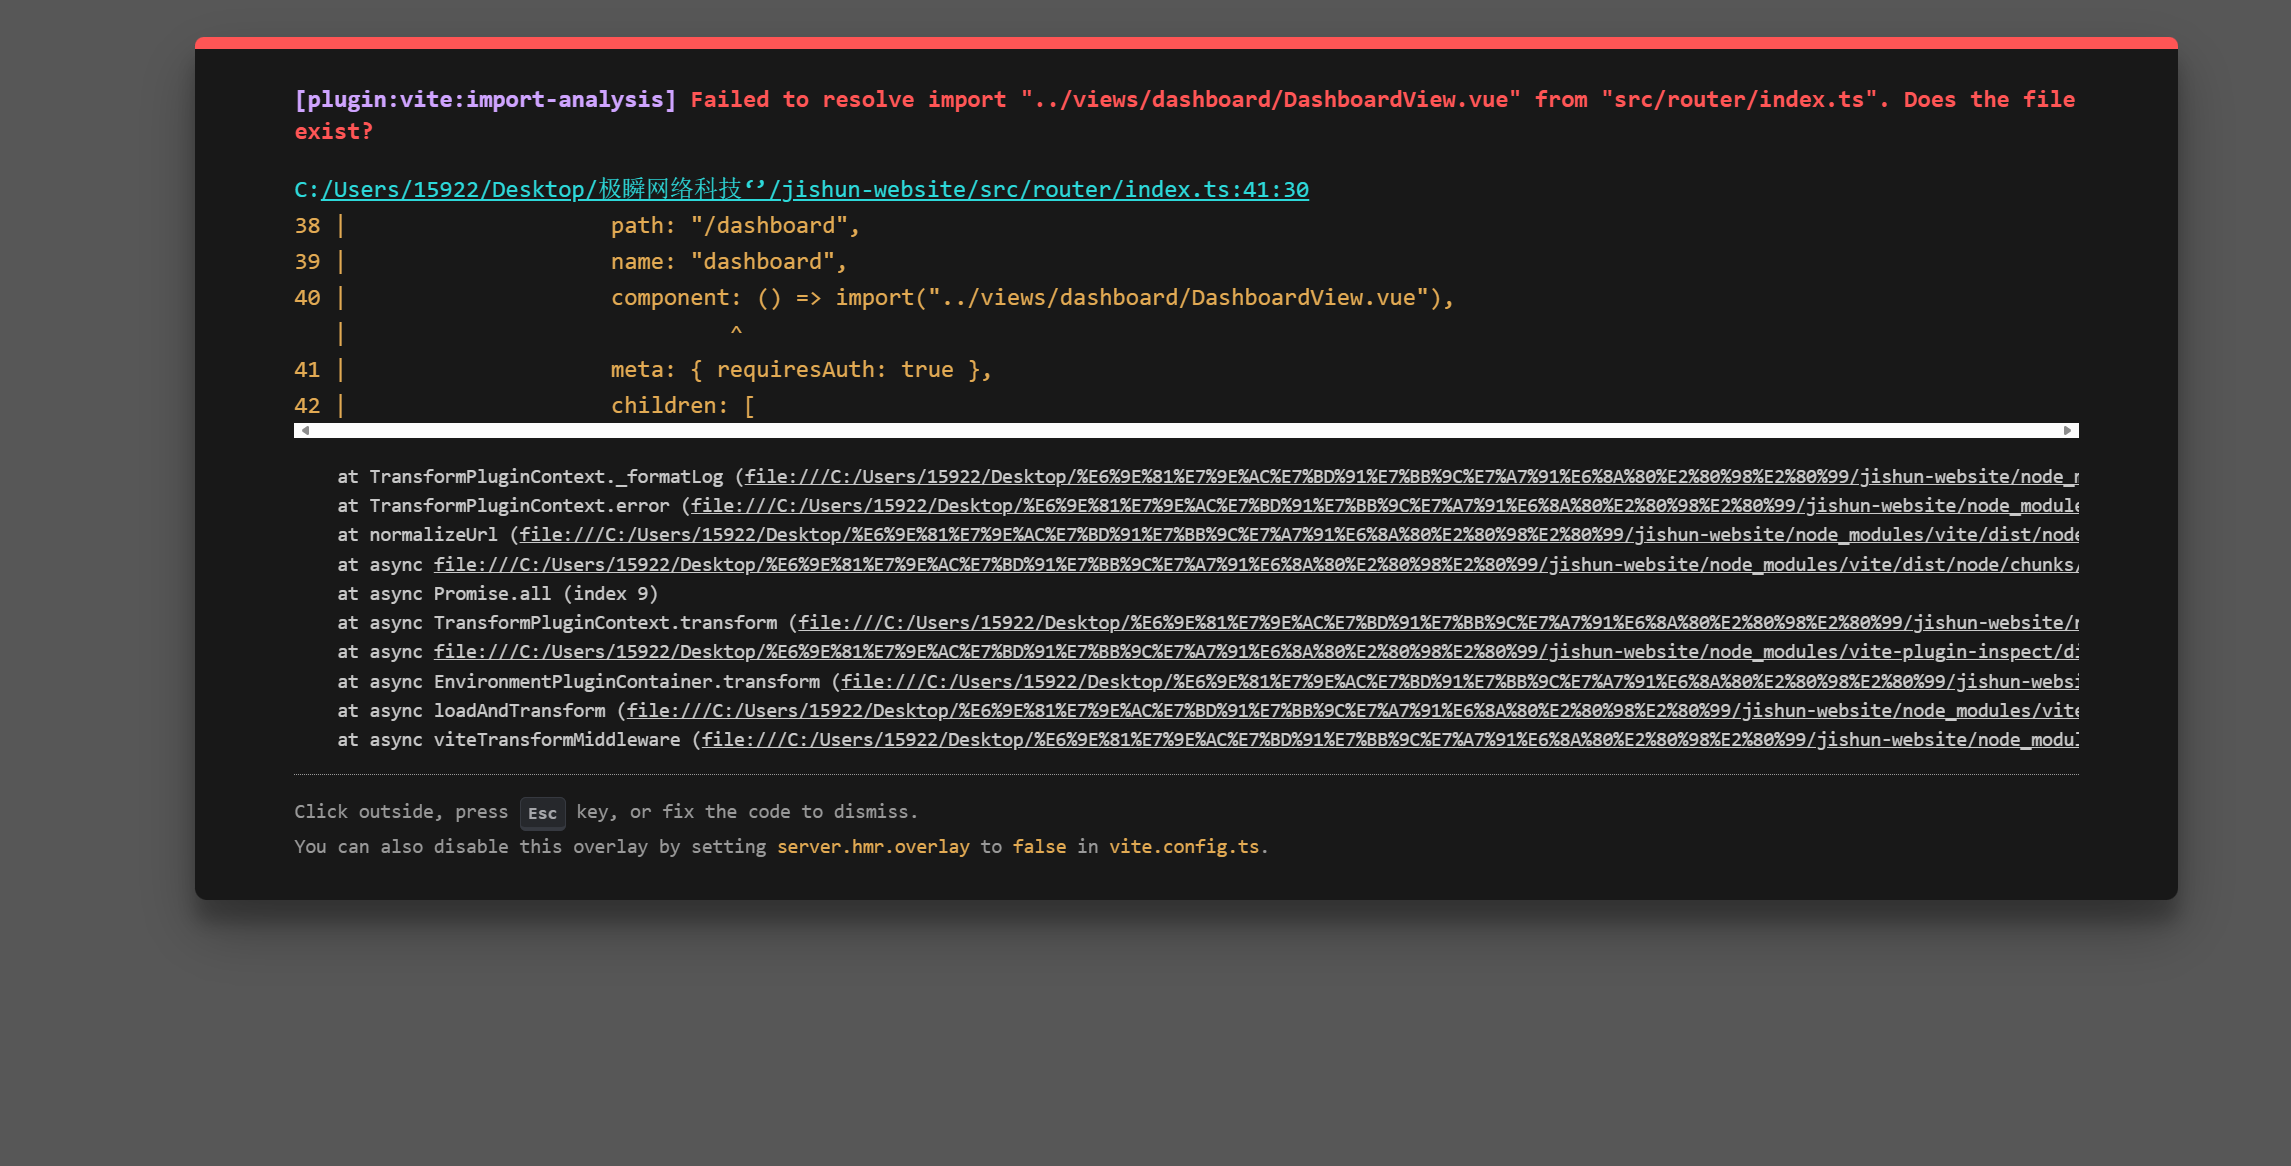
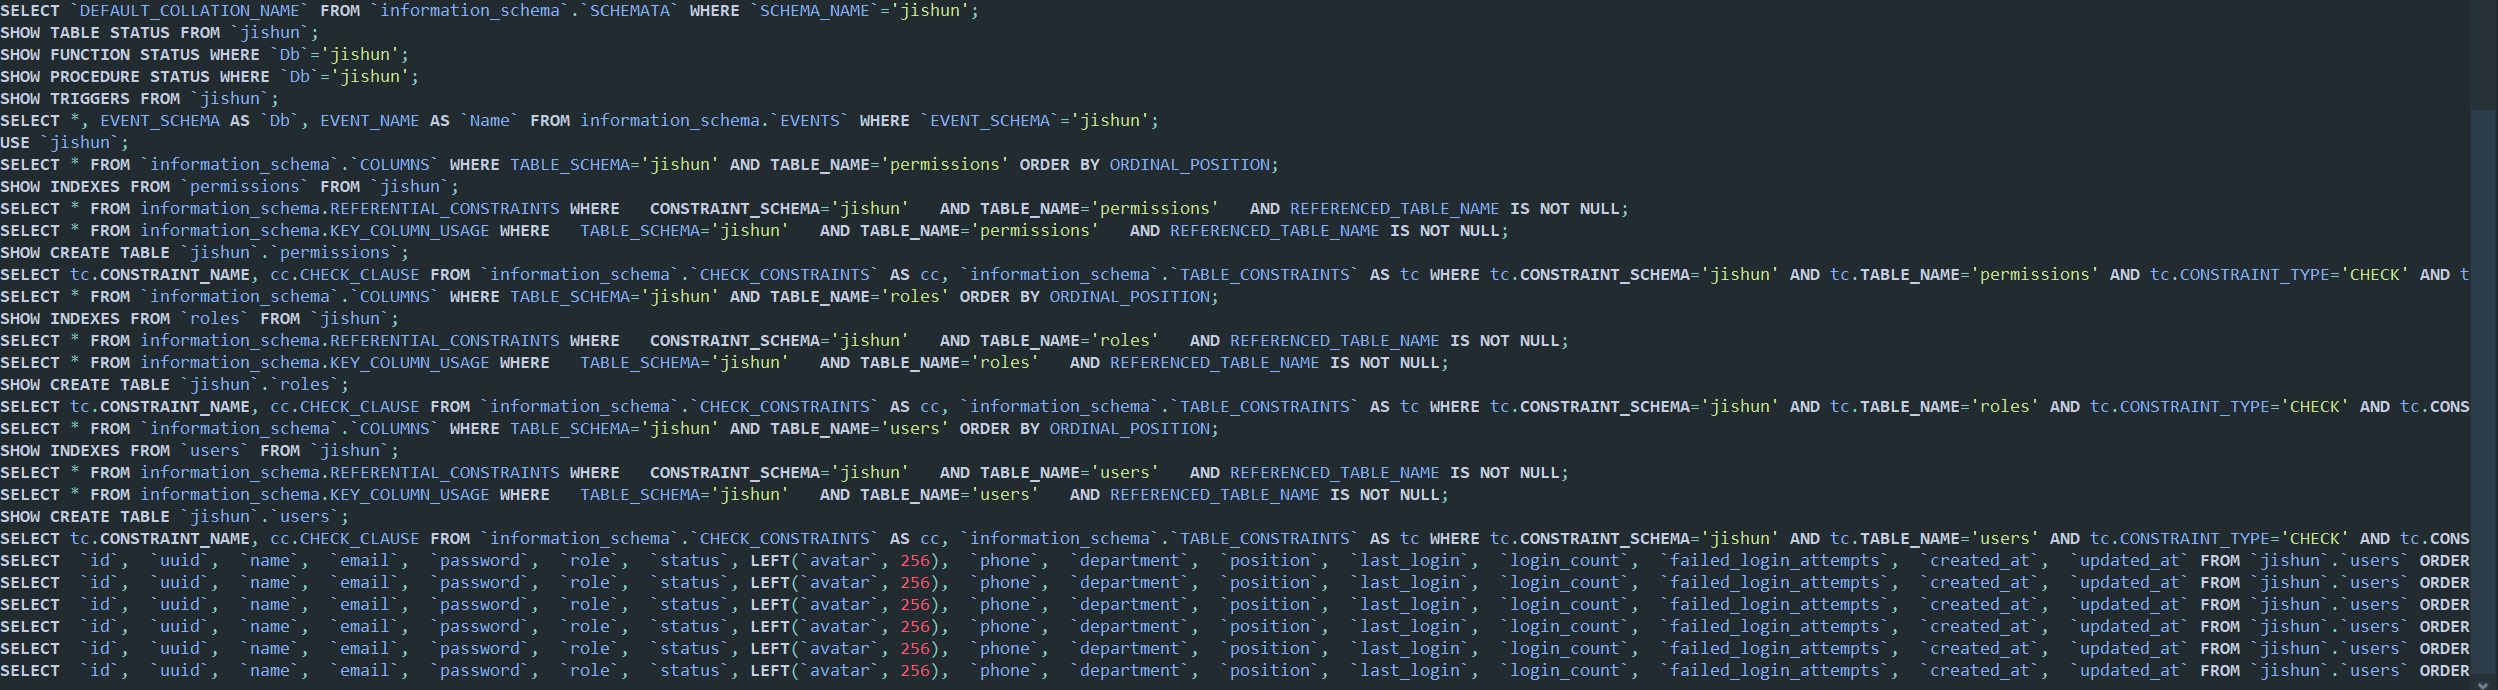
那么下面请欣赏我的报错


![洛谷 P11345 [KTSC 2023 R2] 基地简化 题解](http://www.itfaba.com/wp-content/themes/kemi/timthumb.php?src=http://www.itfaba.com/wp-content/themes/kemi/img/random/1.jpg&w=218&h=124&zc=1)
