
前言
在此记录下使用 elementui,antDesign,antDesignVue 的表格嵌套表单校验的一些经验。
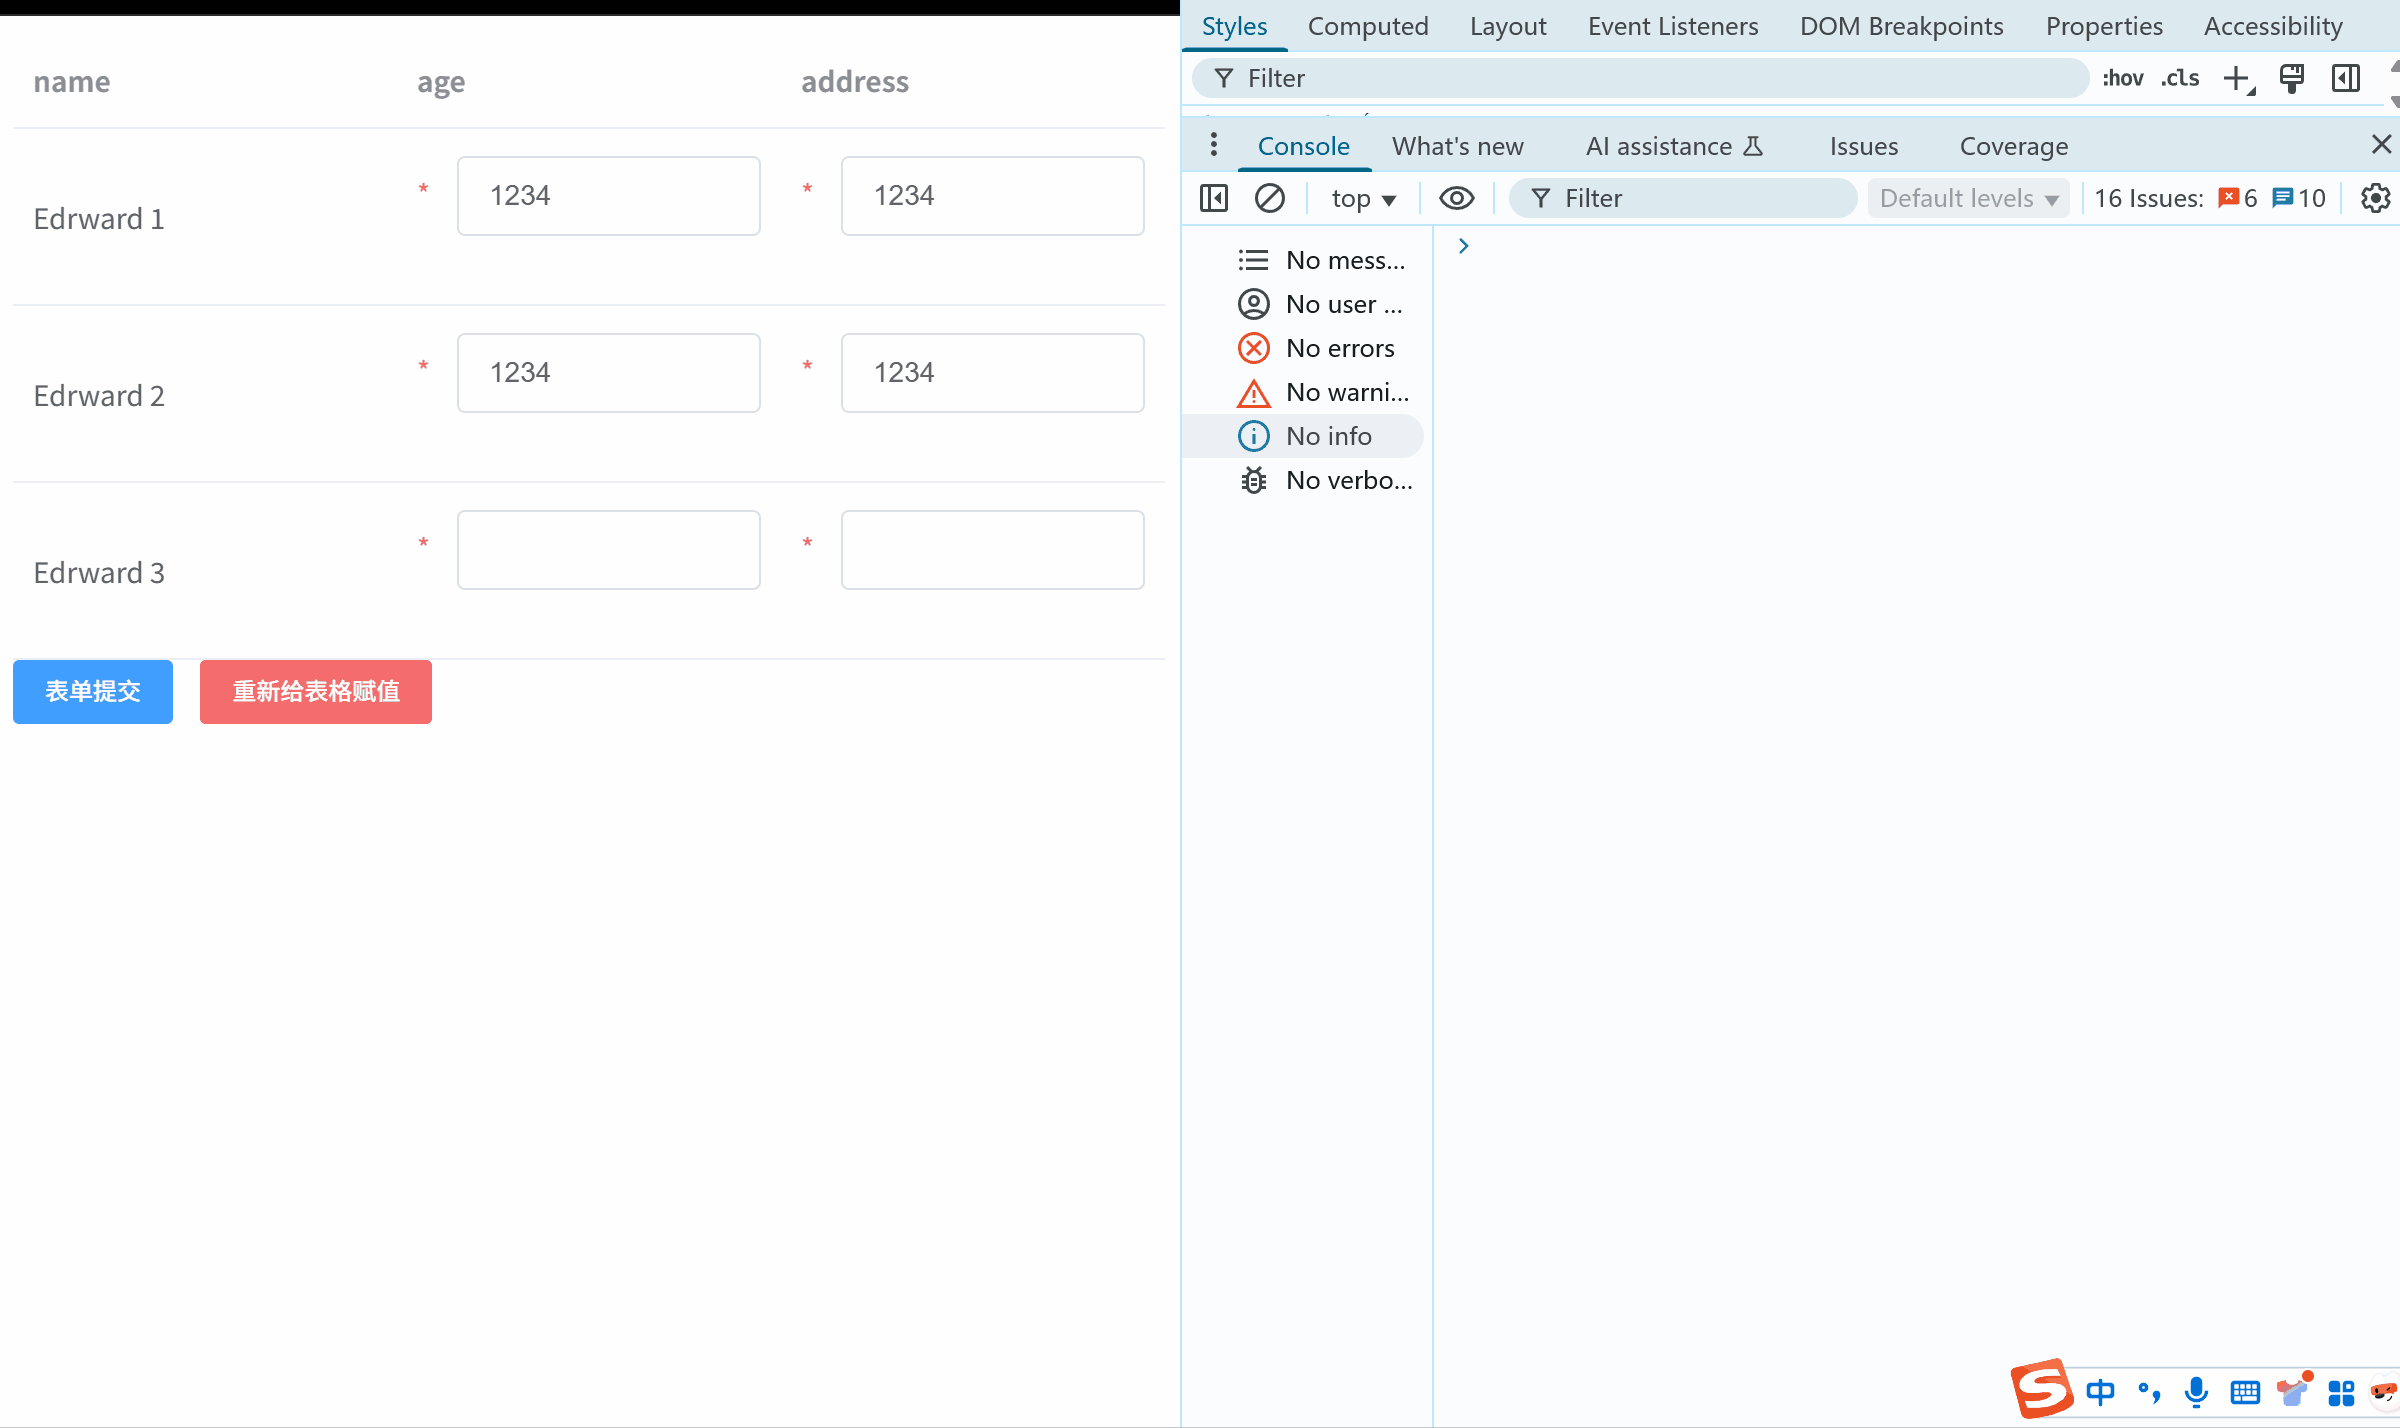
要达到的目的是:有个多行表格,每一行有多个表单项(比如输入框),表单项填完值后,点击提交,校验表格中所有表单项,校验通过则将整个表格数据送到后台。还可以重新给表格赋值(比如进入详情页面)。效果如下:

正文
elementui 和 elementPlus 使用方式一样,这里就只用 elementui 来举例,版本是 2.x。
antDesignVue 1.x 版本有两种表单校验方式,v-decorator 和 FormModel ,要达到上面的效果需要用 FormModel 的方式,而后面 2.x 及以后的版本将两种方式合并,统一用 FormModel 的方式。
antDesign 我这里用的 3.x 版本,用的是 getFieldDecorator 方式,并且是函数式组件的写法。
需要注意的是如果使用的是
react@<15.3.0,则getFieldDecorator调用不能位于纯函数组件中。
elementui 用法
只需要将 prop 里面的属性和v-model表单数据引用保持一致即可,例如:
:prop="'rows.'+scope.$index+'.age'" v-model.trim="asdfform.rows[scope.$index].age" 页面结构
<el-form :model="asdfform" ref="asdfform" label-width="20px"> <el-table :data="asdfform.rows"> <el-table-column prop="name" label="name"></el-table-column> <el-table-column prop="age" label="age"> <template slot-scope="scope"> <el-form-item label=" " :rules="[{required: true, message:'请输入'}]" :prop="'rows.'+scope.$index+'.age'"> <el-input v-model.trim="asdfform.rows[scope.$index].age"></el-input> </el-form-item> </template> </el-table-column> <el-table-column prop="address" label="address"> <template slot-scope="scope"> <el-form-item label=" " :rules="[{required:true,message:'请输入'}]" :prop="'rows.'+ scope.$index + '.address'"> <el-input v-model.trim="asdfform.rows[scope.$index].address"></el-input> </el-form-item> </template> </el-table-column> </el-table> </el-form> <el-button type="primary" size="small" @click="handleSubmit">表单提交</el-button> <el-button type="danger" size="small" @click="resetTableData">重新给表格赋值</el-button> 数据和方法定义
data() { return { asdfform: { rows: [ { key: 1, name: `Edrward ${1}`, age: "1234", address: "1234" }, { key: 2, name: `Edrward ${2}`, age: "1234", address: "1234" }, { key: 3, name: `Edrward ${3}`, age: "", address: "" }, ], }, }; }, methods: { handleSubmit() { this.$refs.asdfform.validate((valid) => { console.log('表格数据',JSON.parse(JSON.stringify(this.asdfform))); if (valid) { } }); }, resetTableData() { this.asdfform.rows = [ { key: 1, name: `Edrward ${1}`, age: "1234", address: "1234" }, { key: 2, name: `Edrward ${2}`, age: "1234", address: "1234" }, { key: 3, name: `Edrward ${3}`, age: "", address: "" }, { key: 4, name: `Edrward ${4}`, age: "4", address: "44" }, ]; }, }, antDesignVue 1.x 用法
如果用的是FormModel 方式,那么写法和 elementui 中一样,不过需要先引入
import { FormModel } from 'ant-design-vue' Vue.use(FormModel) 页面中使用
<a-form-model :model="asdfform" ref="asdfform"> <a-table :columns="asdfcolumns" :dataSource="asdfform.rows" bordered :rowKey="(record,index)=>index" > <template slot="age" slot-scope="text,record, index"> <a-form-model-item label=" " :prop="'rows.'+index+'.age'" :rules=" [{required: true, message:'请输入'}]" > <a-input v-model="asdfform.rows[index].age" /> </a-form-model-item> </template> <template slot="address" slot-scope="text,record,index"> <a-form-model-item label=" " :prop="'rows.'+index+'.address'" :rules="[{required: true, message:'请输入' }]" > <a-input v-model="asdfform.rows[index].address" /> </a-form-model-item> </template> </a-table> <a-form-item> <a-button type="primary" @click="handleSubmit">Submit</a-button> </a-form-item> </a-form-model> data: function () { return { asdfform: { rows: [ { key: 1, name: `Edrward ${1}`, age: '1234', address: '1234' }, { key: 2, name: `Edrward ${2}`, age: '1234', address: '1234' }, { key: 3, name: `Edrward ${3}`, age: '', address: '' }, ] }, asdfcolumns: [ { title: 'name', dataIndex: 'name', width: '25%' }, { title: 'age', dataIndex: 'age', width: '15% ', scopedSlots: { customRender: 'age' } }, { title: 'address', dataIndex: 'address', width: '40%', scopedSlots: { customRender: 'address' } }, { title: 'operation', dataIndex: 'operation' }, ], } }, methods: { handleSubmit() { this.$refs.asdfform.validate(valid => { console.log(this.asdfform) if (valid) { } }); } } antDesign 3.x 用法
react 中没有 v-model 的用法,这里通过 setState + useEffect 来实现。
vue 中使用 asdfform 定义表单数据,asdfform.rows 定义表格数据,也就是表格数据是嵌套在表单数据里面的,所以表单项改变,表格数据也会同步改变。
react 中表格数据和表单数据的分开维护的,所以当表格数据改变时,需要在 useEffect 里面同步表单数据,同样表单数据变化后,提交函数中也会创建一份新的表格数据。
1、定义基本结构
这里使用了 Form.create 和 getFieldDecorator 的方式校验表单。
经 Form.create() 包装过的组件会自带 this.props.form 属性。
使用
Form.create处理后的表单具有自动收集数据并校验的功能,但如果您不需要这个功能,或者默认的行为无法满足业务需求,可以选择不使用Form.create并自行处理数据。
const App = ({ form }) => { const { getFieldDecorator, setFieldsValue, validateFields } = form; // 定义表格数据 const [data, setData] = useState([ { key: 1, name: `Edrward ${1}`, age: "1234", address: "1234" }, { key: 2, name: `Edrward ${2}`, age: "1234", address: "1234" }, { key: 3, name: `Edrward ${3}`, age: "", address: "" }, ]); return ( <> <Form> <Table columns={asdfcolumns} dataSource={data} pagination={false} rowKey="key" ></Table> <Form.Item> <Button type="primary" onClick={handleSubmit}> Submit </Button> <Button onClick={handleReset}>reset</Button> </Form.Item> </Form> </> ); } const WrappedMyFormComponent = Form.create()(App); export default WrappedMyFormComponent; 2、添加表格列,根据需要自定义列内容
const asdfcolumns = [ { title: "name", dataIndex: "name", width: "25%" }, { title: "age", dataIndex: "age", width: "15%", render: (text, record, index) => ( <Form.Item> {getFieldDecorator(`data.${index}.age`, { rules: [{ required: true, message: "请输入" }], initialValue: record["age"], })(<Input />)} </Form.Item> ), }, { title: "address", dataIndex: "address", width: "40%", render: (text, record, index) => ( <Form.Item> {getFieldDecorator(`data.${index}.address`, { rules: [ { required: true, message: "请输入!", }, ], initialValue: record["address"], })(<Input />)} </Form.Item> ), }, { title: "operation", dataIndex: "operation" }, ]; 3、添加提交函数和重置数据函数(给表格重新赋值)
const handleSubmit = () => { validateFields((err, values) => { console.log("Received values of form: ", values); if (!err) { const updatedData = data.map((item, index) => ({ ...item, age: values.data[index].age, address: values.data[index].address, })); console.log(updatedData); //更新后的数据 } }); }; const handleReset = () => { let newData = [ { key: 1, name: `Edrward ${1}`, age: "1", address: "2" }, { key: 2, name: `Edrward ${2}`, age: "3", address: "4" }, { key: 3, name: `Edrward_${3}`, age: "", address: "" }, { key: 4, name: `Edrward ${3}`, age: "5", address: "6" }, setData(newData), ]; }; 4、表格数据改变后同步更新表单
useEffect(() => { //当 data 状态更新时,手动设置表单字段的值 const fields = data.reduce((acc, record, index) => { acc[`data.${index}.age`] = record.age; acc[`data.${index}.address`] = record.address; return acc; }, {}); setFieldsValue(fields); }, [data]); antDesign 的完整代码
import { Button, Form, Input, Table } from "antd"; import { useEffect, useState } from "react"; const App = ({ form }) => { const { getFieldDecorator, setFieldsValue, validateFields } = form; const asdfcolumns = [ { title: "name", dataIndex: "name", width: "25%" }, { title: "age", dataIndex: "age", width: "15%", render: (text, record, index) => ( <Form.Item> {getFieldDecorator(`data.${index}.age`, { rules: [{ required: true, message: "请输入" }], initialValue: record["age"], })(<Input />)} </Form.Item> ), }, { title: "address", dataIndex: "address", width: "40%", render: (text, record, index) => ( <Form.Item> {getFieldDecorator(`data.${index}.address`, { rules: [ { required: true, message: "请输入!", }, ], initialValue: record["address"], })(<Input />)} </Form.Item> ), }, { title: "operation", dataIndex: "operation" }, ]; const [data, setData] = useState([ { key: 1, name: `Edrward ${1}`, age: "1234", address: "1234" }, { key: 2, name: `Edrward ${2}`, age: "1234", address: "1234" }, { key: 3, name: `Edrward ${3}`, age: "", address: "" }, ]); const handleSubmit = () => { validateFields((err, values) => { if (!err) { console.log("Received values of form: ", values); const updatedData = data.map((item, index) => ({ ...item, age: values.data[index].age, address: values.data[index].address, })); console.log(updatedData); } }); }; const handleReset = () => { let newData = [ { key: 1, name: `Edrward ${1}`, age: "1", address: "2" }, { key: 2, name: `Edrward ${2}`, age: "3", address: "4" }, { key: 3, name: `Edrward_${3}`, age: "", address: "" }, { key: 4, name: `Edrward ${3}`, age: "5", address: "6" }, setData(newData), ]; }; useEffect(() => { //当 data 状态更新时,手动设置表单字段的值 const fields = data.reduce((acc, record, index) => { acc[`data.${index}.age`] = record.age; acc[`data.${index}.address`] = record.address; return acc; }, {}); setFieldsValue(fields); }, [data]); return ( <> <Form> <Table columns={asdfcolumns} dataSource={data} pagination={false} rowKey="key" ></Table> <Form.Item> <Button type="primary" onClick={handleSubmit}> Submit </Button> <Button onClick={handleReset}>reset</Button> </Form.Item> </Form> </> ); }; const WrappedMyFormComponent = Form.create()(App); export default WrappedMyFormComponent; 


![洛谷 P11345 [KTSC 2023 R2] 基地简化 题解](http://www.itfaba.com/wp-content/themes/kemi/timthumb.php?src=http://www.itfaba.com/wp-content/themes/kemi/img/random/1.jpg&w=218&h=124&zc=1)
