译者注
这是在Datadog公司任职的Kevin Gosse大佬使用C#编写.NET分析器的系列文章之一,在国内只有很少很少的人了解和研究.NET分析器,它常被用于APM(应用性能诊断)、IDE、诊断工具中,比如Datadog的APM,Visual Studio的分析器以及Rider和Reshaper等等。之前只能使用C++编写,自从.NET NativeAOT发布以后,使用C#编写变为可能。
笔者最近也在尝试开发一个运行时方法注入的工具,欢迎熟悉MSIL 、PE Metadata 布局、CLR 源码、CLR Profiler API的大佬,或者对这个感兴趣的朋友留联系方式或者在公众号留言,一起交流学习。
原作者:Kevin Gosse
原文链接:https://minidump.net/writing-a-net-profiler-in-c-part-3-7d2c59fc017f
项目链接:https://github.com/kevingosse/ManagedDotnetProfiler
使用C#编写.NET分析器-一:https://www.cnblogs.com/InCerry/p/writing-a-net-profiler-in-c-sharp-part-1.html
使用C#编写.NET分析器-二:https://www.cnblogs.com/InCerry/p/writing-a-net-profiler-in-c-sharp-part-2.html
正文
在第一部分中,我们了解了如何使用NativeAOT让我们用C#编写一个分析器,以及如何暴露一个伪造的COM对象来使用分析API。在第二部分中,我们改进了解决方案,使用实例方法替代静态方法。现在我们知道了如何与分析API进行交互,我们将编写一个源代码生成器,自动生成实现ICorProfilerCallback接口中声明的70多个方法所需的样板代码。
首先,我们需要手动将ICorProfilerCallback接口转换为C#。从技术上讲,本可以从C++头文件中自动生成这些代码,但是相同的C++代码在C#中可以用不同的方式翻译,因此了解函数的目的以正确语义进行转换十分重要。
以JITInlining函数为实际例子。在C++中的原型是:
HRESULT JITInlining(FunctionID callerId, FunctionID calleeId, BOOL *pfShouldInline); 一个简单的C#版本转换可能是:
HResult JITInlining(FunctionId callerId, FunctionId calleeId, in bool pfShouldInline); 但是,如果我们查看函数的文档,我们可以了解到pfShouldInline是一个应由函数自身设置的值。所以我们应该使用out关键字:
Result JITInlining(FunctionId callerId, FunctionId calleeId, out bool pfShouldInline); 在其他情况下,我们会根据意图使用in或ref关键字。这就是为什么我们无法完全自动化这个过程。
在将接口转换为C#之后,我们可以继续创建源代码生成器。请注意,我并不打算编写一个最先进的源代码生成器,主要原因是API非常复杂(是的,这话来自于一个教你如何用C#编写分析器的人),你可以查看Andrew Lock的精彩文章来了解如何编写高级源代码生成器。
编写源代码生成器
要创建源代码生成器,我们在解决方案中添加一个针对netstandard2.0的类库项目,并添加对Microsoft.CodeAnalysis.CSharp和Microsoft.CodeAnalysis.Analyzers的引用:
<Project Sdk="Microsoft.NET.Sdk"> <PropertyGroup> <TargetFramework>netstandard2.0</TargetFramework> <ImplicitUsings>enable</ImplicitUsings> <LangVersion>latest</LangVersion> <IsRoslynComponent>true</IsRoslynComponent> </PropertyGroup> <ItemGroup> <PackageReference Include="Microsoft.CodeAnalysis.CSharp" Version="4.0.1" PrivateAssets="all" /> <PackageReference Include="Microsoft.CodeAnalysis.Analyzers" Version="3.3.3"> <PrivateAssets>all</PrivateAssets> <IncludeAssets>runtime; build; native; contentfiles; analyzers; buildtransitive</IncludeAssets> </PackageReference> </ItemGroup> </Project> 接下来,我们添加一个实现ISourceGenerator接口的类,并用[Generator]属性进行修饰:
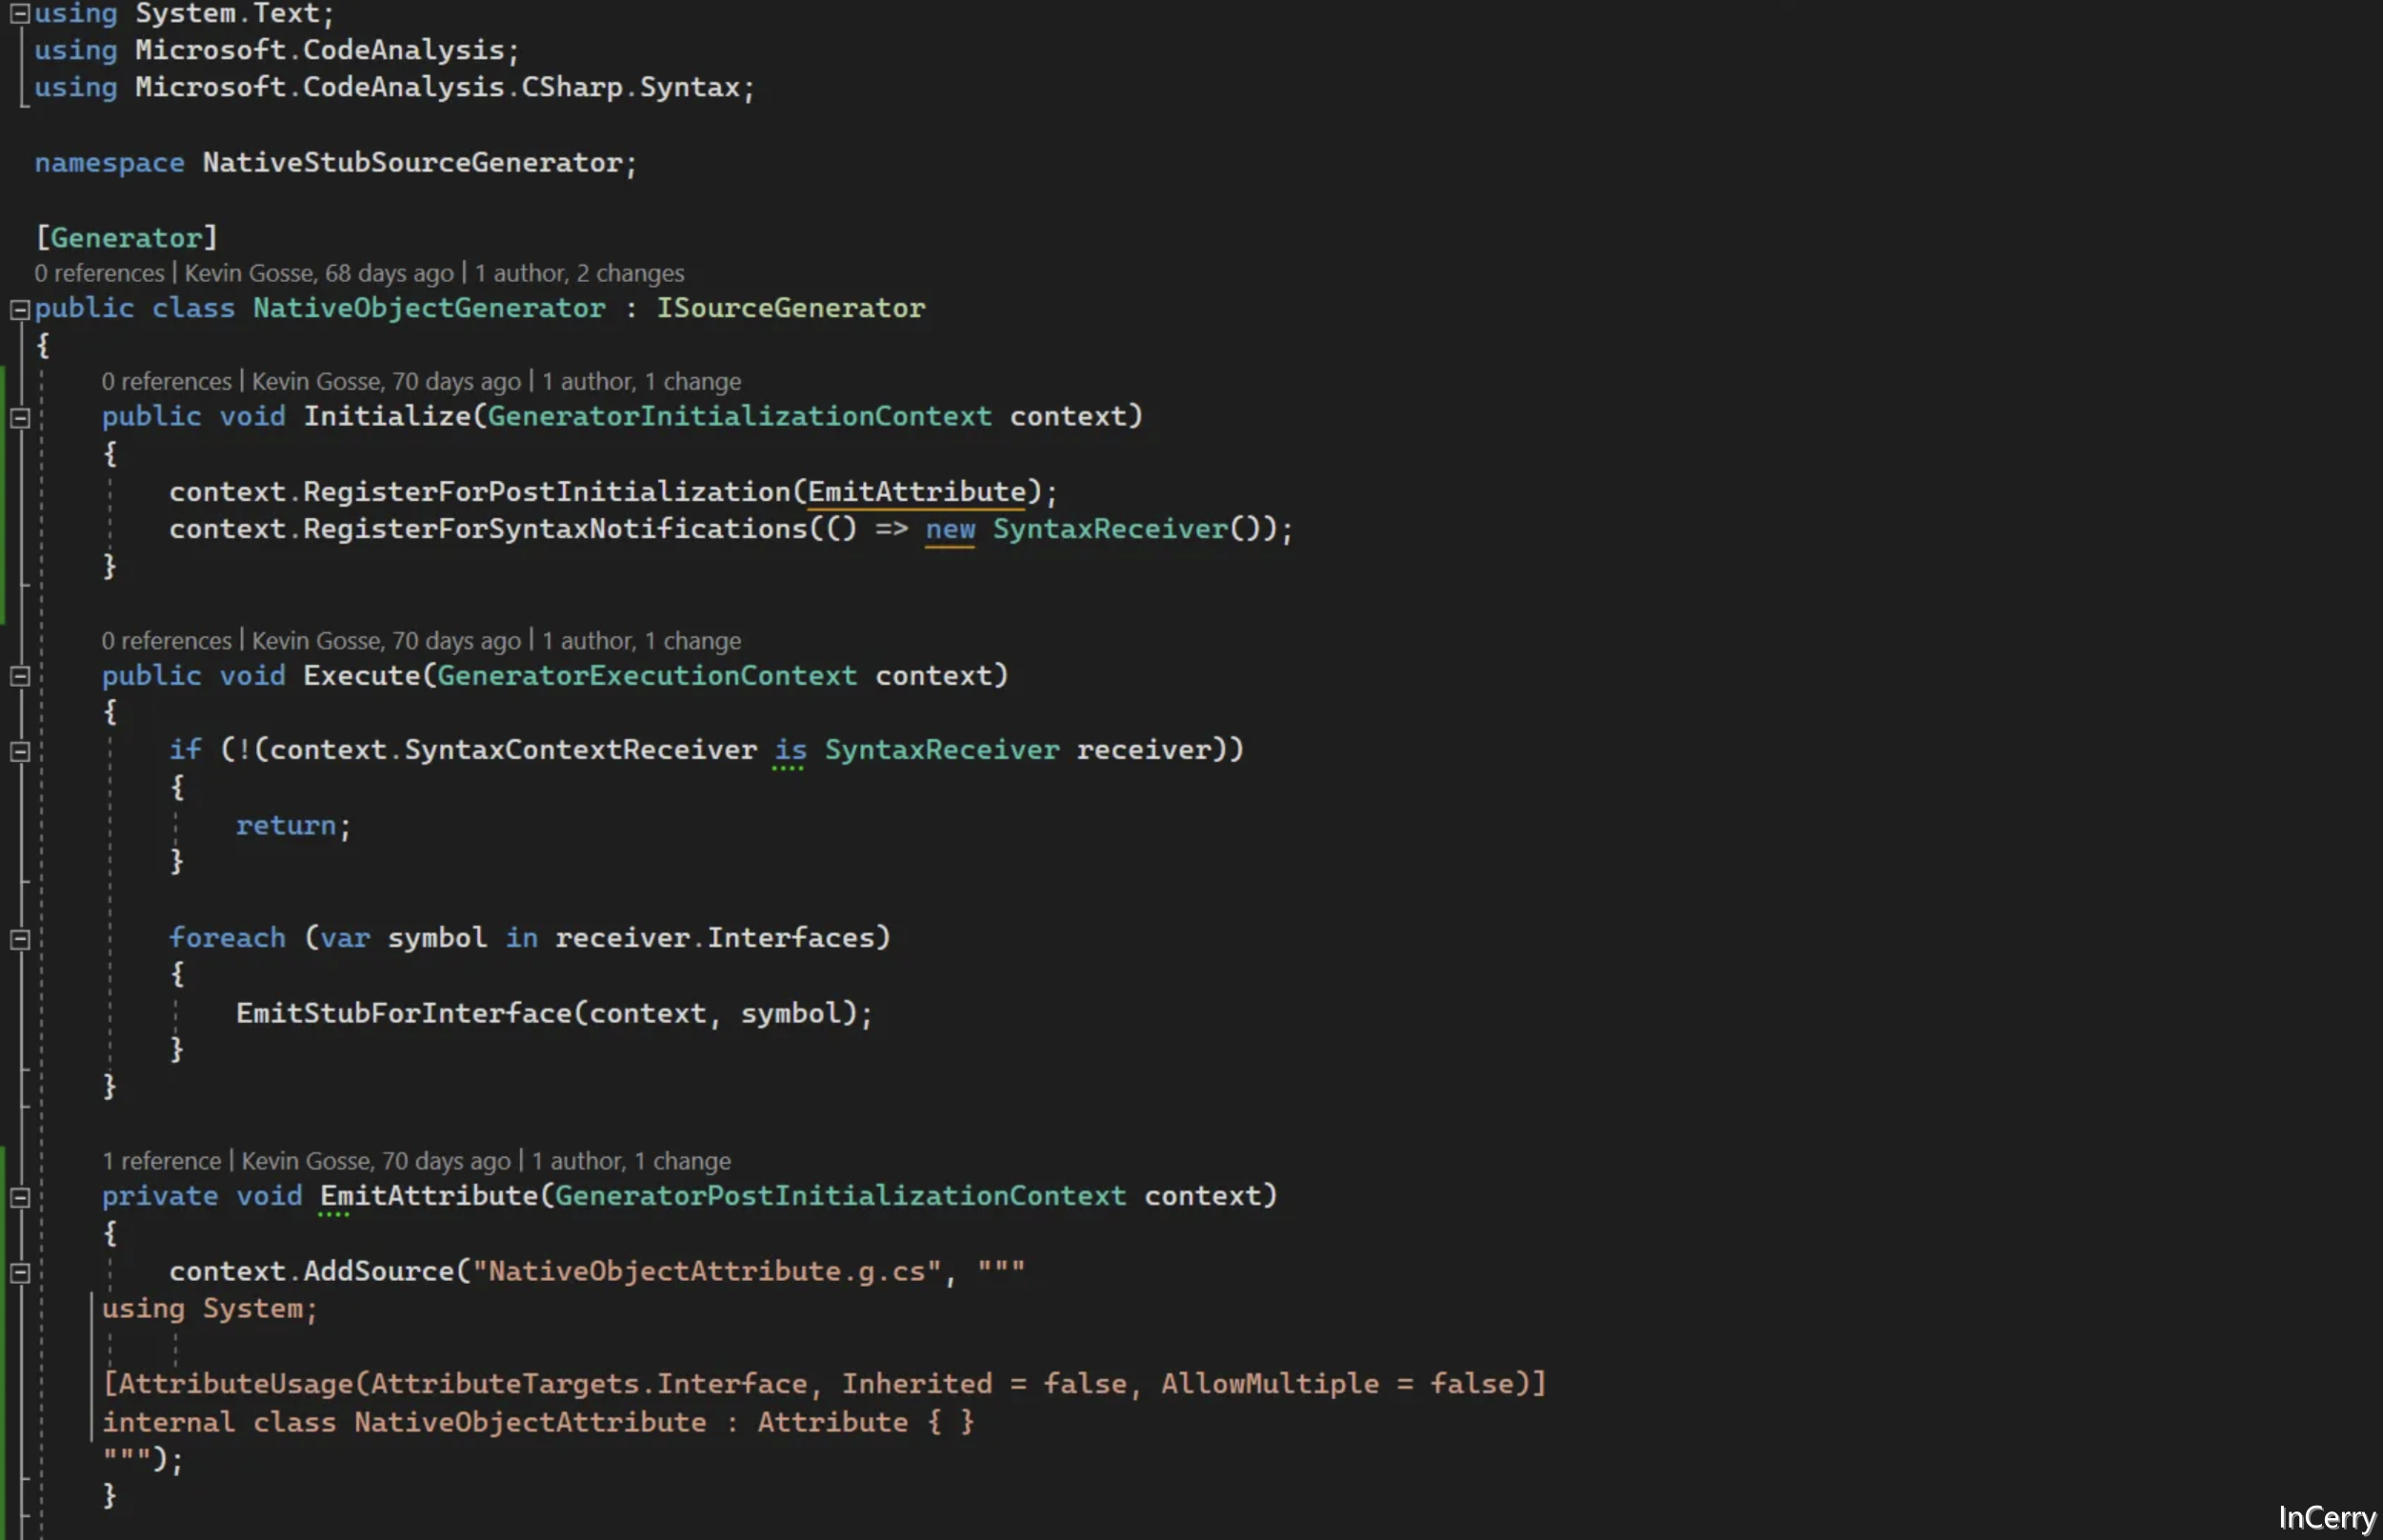
[Generator] public class NativeObjectGenerator : ISourceGenerator { public void Initialize(GeneratorInitializationContext context) { } public void Execute(GeneratorExecutionContext context) { } } 我们要做的第一件事是生成一个[NativeObject]属性。我们将用它来修饰我们想要在源代码生成器上运行的接口。我们使用RegisterForPostInitialization在管道早期运行这段代码:
[Generator] public class NativeObjectGenerator : ISourceGenerator { public void Initialize(GeneratorInitializationContext context) { context.RegisterForPostInitialization(EmitAttribute); } public void Execute(GeneratorExecutionContext context) { } private void EmitAttribute(GeneratorPostInitializationContext context) { context.AddSource("NativeObjectAttribute.g.cs", """ using System; [AttributeUsage(AttributeTargets.Interface, Inherited = false, AllowMultiple = false)] internal class NativeObjectAttribute : Attribute { } """); } } 现在我们需要注册一个ISyntaxContextReceiver来检查类型并检测哪些类型被我们的 [NativeObject] 属性修饰。
public class SyntaxReceiver : ISyntaxContextReceiver { public List<INamedTypeSymbol> Interfaces { get; } = new(); public void OnVisitSyntaxNode(GeneratorSyntaxContext context) { if (context.Node is InterfaceDeclarationSyntax classDeclarationSyntax && classDeclarationSyntax.AttributeLists.Count > 0) { var symbol = (INamedTypeSymbol)context.SemanticModel.GetDeclaredSymbol(classDeclarationSyntax); if (symbol.GetAttributes().Any(a => a.AttributeClass.ToDisplayString() == "NativeObjectAttribute")) { Interfaces.Add(symbol); } } } } 基本上,语法接收器将被用于访问语法树中的每个节点。我们检查该节点是否是一个接口声明,如果是,我们检查属性以查找NativeObjectAttribute。可能有很多事情都可以改进,特别是确认它是否是我们的NativeObjectAttribute,但我们认为对于我们的目的来说这已经足够好了。
在源代码生成器初始化期间,需要注册语法接收器:
public void Initialize(GeneratorInitializationContext context) { context.RegisterForPostInitialization(EmitAttribute); context.RegisterForSyntaxNotifications(() => new SyntaxReceiver()); } 最后,在Execute方法中,我们获取存储在语法接收器中的接口列表,并为其生成代码:
public void Execute(GeneratorExecutionContext context) { if (!(context.SyntaxContextReceiver is SyntaxReceiver receiver)) { return; } foreach (var symbol in receiver.Interfaces) { EmitStubForInterface(context, symbol); } } 
生成Native包装器
对于EmitStubForInterface方法,我们可以使用模板引擎,但是我们将依赖于一个经典的StringBuilder和Replace调用。
首先,我们创建我们的模板:
var sourceBuilder = new StringBuilder(""" using System; using System.Runtime.InteropServices; namespace NativeObjects { {visibility} unsafe class {typeName} : IDisposable { private {typeName}({interfaceName} implementation) { const int delegateCount = {delegateCount}; var obj = (IntPtr*)NativeMemory.Alloc((nuint)2 + delegateCount, (nuint)IntPtr.Size); var vtable = obj + 2; *obj = (IntPtr)vtable; var handle = GCHandle.Alloc(implementation); *(obj + 1) = GCHandle.ToIntPtr(handle); {functionPointers} Object = (IntPtr)obj; } public IntPtr Object { get; private set; } public static {typeName} Wrap({interfaceName} implementation) => new(implementation); public static implicit operator IntPtr({typeName} stub) => stub.Object; ~{typeName}() { Dispose(); } public void Dispose() { if (Object != IntPtr.Zero) { NativeMemory.Free((void*)Object); Object = IntPtr.Zero; } GC.SuppressFinalize(this); } private static class Exports { {exports} } } } """); 如果你对某些部分不理解,请记得查看前一篇文章。这里唯一的新内容是析构函数和Dispose方法,我们在其中调用NativeMemory.Free来释放为该对象分配的内存。接下来,我们需要填充所有的模板部分:{visibility}、{typeName}、{interfaceName}、{delegateCount}、{functionPointers} 和 {exports}。
首先是简单的部分:
var interfaceName = symbol.ToString(); var typeName = $"{symbol.Name}"; var visibility = symbol.DeclaredAccessibility.ToString().ToLower(); // To be filled later int delegateCount = 0; var exports = new StringBuilder(); var functionPointers = new StringBuilder(); 对于一个接口MyProfiler.ICorProfilerCallback,我们将生成一个类型为NativeObjects.ICorProfilerCallback的包装器。这就是为什么我们将完全限定名存储在interfaceName(= MyProfiler.ICorProfilerCallback)中,而仅将类型名存储在typeName(= ICorProfilerCallback)中。
接下来我们想要生成导出列表及其函数指针。我希望源代码生成器支持继承,以避免代码重复,因为ICorProfilerCallback13实现了ICorProfilerCallback12,而ICorProfilerCallback12本身又实现了ICorProfilerCallback11,依此类推。因此我们提取目标接口继承自的接口列表,并为它们中的每一个提取方法:
var interfaceList = symbol.AllInterfaces.ToList(); interfaceList.Reverse(); interfaceList.Add(symbol); foreach (var @interface in interfaceList) { foreach (var member in @interface.GetMembers()) { if (member is not IMethodSymbol method) { continue; } // TODO: Inspect the method } } 对于一个QueryInterface(in Guid guid, out IntPtr ptr)方法,我们将生成的导出看起来像这样:
[UnmanagedCallersOnly] public static int QueryInterface(IntPtr* self, Guid* __arg1, IntPtr* __arg2) { var handleAddress = *(self + 1); var handle = GCHandle.FromIntPtr(handleAddress); var obj = (IUnknown)handle.Target; var result = obj.QueryInterface(*__arg1, out var __local2); *__arg2 = __local2; return result; } 由于这些方法是实例方法,我们添加了IntPtr* self参数。另外,如果托管接口中的函数带有in/out/ref关键字修饰,我们将参数声明为指针类型,因为UnmanagedCallersOnly方法不支持in/out/ref。
生成导出所需的代码为:
var parameterList = new StringBuilder(); parameterList.Append("IntPtr* self"); foreach (var parameter in method.Parameters) { var isPointer = parameter.RefKind == RefKind.None ? "" : "*"; parameterList.Append($", {parameter.Type}{isPointer} __arg{parameter.Ordinal}"); } exports.AppendLine($" [UnmanagedCallersOnly]"); exports.AppendLine($" public static {method.ReturnType} {method.Name}({parameterList})"); exports.AppendLine($" {{"); exports.AppendLine($" var handle = GCHandle.FromIntPtr(*(self + 1));"); exports.AppendLine($" var obj = ({interfaceName})handle.Target;"); exports.Append($" "); if (!method.ReturnsVoid) { exports.Append("var result = "); } exports.Append($"obj.{method.Name}("); for (int i = 0; i < method.Parameters.Length; i++) { if (i > 0) { exports.Append(", "); } if (method.Parameters[i].RefKind == RefKind.In) { exports.Append($"*__arg{i}"); } else if (method.Parameters[i].RefKind is RefKind.Out) { exports.Append($"out var __local{i}"); } else { exports.Append($"__arg{i}"); } } exports.AppendLine(");"); for (int i = 0; i < method.Parameters.Length; i++) { if (method.Parameters[i].RefKind is RefKind.Out) { exports.AppendLine($" *__arg{i} = __local{i};"); } } if (!method.ReturnsVoid) { exports.AppendLine($" return result;"); } exports.AppendLine($" }}"); exports.AppendLine(); exports.AppendLine(); 对于函数指针,给定与前面相同的方法,我们希望建立:
*(vtable + 1) = (IntPtr)(delegate* unmanaged<IntPtr*, Guid*, IntPtr*>)&Exports.QueryInterface; 生成代码如下:
var sourceArgsList = new StringBuilder(); sourceArgsList.Append("IntPtr _"); for (int i = 0; i < method.Parameters.Length; i++) { sourceArgsList.Append($", {method.Parameters[i].OriginalDefinition} a{i}"); } functionPointers.Append($" *(vtable + {delegateCount}) = (IntPtr)(delegate* unmanaged<IntPtr*"); for (int i = 0; i < method.Parameters.Length; i++) { functionPointers.Append($", {method.Parameters[i].Type}"); if (method.Parameters[i].RefKind != RefKind.None) { functionPointers.Append("*"); } } if (method.ReturnsVoid) { functionPointers.Append(", void"); } else { functionPointers.Append($", {method.ReturnType}"); } functionPointers.AppendLine($">)&Exports.{method.Name};"); delegateCount++; 我们在接口的每个方法都完成了这个操作后,我们只需替换模板中的值并添加生成的源文件:
sourceBuilder.Replace("{typeName}", typeName); sourceBuilder.Replace("{visibility}", visibility); sourceBuilder.Replace("{exports}", exports.ToString()); sourceBuilder.Replace("{interfaceName}", interfaceName); sourceBuilder.Replace("{delegateCount}", delegateCount.ToString()); sourceBuilder.Replace("{functionPointers}", functionPointers.ToString()); context.AddSource($"{symbol.ContainingNamespace?.Name ?? "_"}.{symbol.Name}.g.cs", sourceBuilder.ToString()); 就这样,我们的源代码生成器现在准备好了。
使用生成的代码
要使用我们的源代码生成器,我们可以声明IUnknown、IClassFactory和ICorProfilerCallback接口,并用[NativeObject]属性修饰它们:
[NativeObject] public interface IUnknown { HResult QueryInterface(in Guid guid, out IntPtr ptr); int AddRef(); int Release(); } [NativeObject] internal interface IClassFactory : IUnknown { HResult CreateInstance(IntPtr outer, in Guid guid, out IntPtr instance); HResult LockServer(bool @lock); } [NativeObject] public unsafe interface ICorProfilerCallback : IUnknown { HResult Initialize(IntPtr pICorProfilerInfoUnk); // 70+ 多个方法,在这里省略 } 然后我们实现IClassFactory并调用NativeObjects.IClassFactory.Wrap来创建本机包装器并暴露我们的ICorProfilerCallback实例:
public unsafe class ClassFactory : IClassFactory { private NativeObjects.IClassFactory _classFactory; private CorProfilerCallback2 _corProfilerCallback; public ClassFactory() { _classFactory = NativeObjects.IClassFactory.Wrap(this); } // The native wrapper has an implicit cast operator to IntPtr public IntPtr Object => _classFactory; public HResult CreateInstance(IntPtr outer, in Guid guid, out IntPtr instance) { Console.WriteLine("[Profiler] ClassFactory - CreateInstance"); _corProfilerCallback = new(); instance = _corProfilerCallback.Object; return HResult.S_OK; } public HResult LockServer(bool @lock) { return default; } public HResult QueryInterface(in Guid guid, out IntPtr ptr) { Console.WriteLine("[Profiler] ClassFactory - QueryInterface - " + guid); if (guid == KnownGuids.ClassFactoryGuid) { ptr = Object; return HResult.S_OK; } ptr = IntPtr.Zero; return HResult.E_NOTIMPL; } public int AddRef() { return 1; // TODO: 做实际的引用计数 } public int Release() { return 0; // TODO: 做实际的引用计数 } } 并在DllGetClassObject中暴露它:
public class DllMain { private static ClassFactory Instance; [UnmanagedCallersOnly(EntryPoint = "DllGetClassObject")] public static unsafe int DllGetClassObject(void* rclsid, void* riid, nint* ppv) { Console.WriteLine("[Profiler] DllGetClassObject"); Instance = new ClassFactory(); *ppv = Instance.Object; return 0; } } 最后,我们可以实现ICorProfilerCallback的实例:
public unsafe class CorProfilerCallback2 : ICorProfilerCallback2 { private static readonly Guid ICorProfilerCallback2Guid = Guid.Parse("8a8cc829-ccf2-49fe-bbae-0f022228071a"); private readonly NativeObjects.ICorProfilerCallback2 _corProfilerCallback2; public CorProfilerCallback2() { _corProfilerCallback2 = NativeObjects.ICorProfilerCallback2.Wrap(this); } public IntPtr Object => _corProfilerCallback2; public HResult Initialize(IntPtr pICorProfilerInfoUnk) { Console.WriteLine("[Profiler] ICorProfilerCallback2 - Initialize"); // TODO: To be implemented in next article return HResult.S_OK; } public HResult QueryInterface(in Guid guid, out IntPtr ptr) { if (guid == ICorProfilerCallback2Guid) { Console.WriteLine("[Profiler] ICorProfilerCallback2 - QueryInterface"); ptr = Object; return HResult.S_OK; } ptr = IntPtr.Zero; return HResult.E_NOTIMPL; } // Stripped for brevity: the default implementation of all 70+ methods of the interface // Automatically generated by the IDE } 如果我们使用一个测试应用程序运行它,我们会发现这些功能能按预期工作:
[Profiler] DllGetClassObject [Profiler] ClassFactory - CreateInstance [Profiler] ICorProfilerCallback2 - QueryInterface [Profiler] ICorProfilerCallback2 - Initialize Hello, World! 在下一步中,我们将处理拼图的最后一个缺失部分:实现ICorProfilerCallback.Initialize方法并获取ICorProfilerInfo的实例。这样我们就拥有了与性能分析器API实际交互所需的一切。
.NET性能优化交流群
相信大家在开发中经常会遇到一些性能问题,苦于没有有效的工具去发现性能瓶颈,或者是发现瓶颈以后不知道该如何优化。之前一直有读者朋友询问有没有技术交流群,但是由于各种原因一直都没创建,现在很高兴的在这里宣布,我创建了一个专门交流.NET性能优化经验的群组,主题包括但不限于:
-
如何找到.NET性能瓶颈,如使用APM、dotnet tools等工具
-
.NET框架底层原理的实现,如垃圾回收器、JIT等等
-
如何编写高性能的.NET代码,哪些地方存在性能陷阱
希望能有更多志同道合朋友加入,分享一些工作中遇到的.NET性能问题和宝贵的性能分析优化经验。目前一群已满,现在开放二群。
如果提示已经达到200人,可以加我微信,我拉你进群: lishi-wk
另外也创建了QQ群,群号: 687779078,欢迎大家加入。
抽奖送书活动预热!!!
感谢大家对我公众号的支持与陪伴!为庆祝公众号一周年,抽奖送出一些书籍,请大家关注公众号后续推文!