
前言
今天以Stylet.Samples.Hello这个demo为例,学习一下Stylet的启动机制。
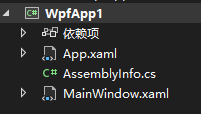
平常我们新建一个WPF程序结构是这样的:
启动之后就是这样的:
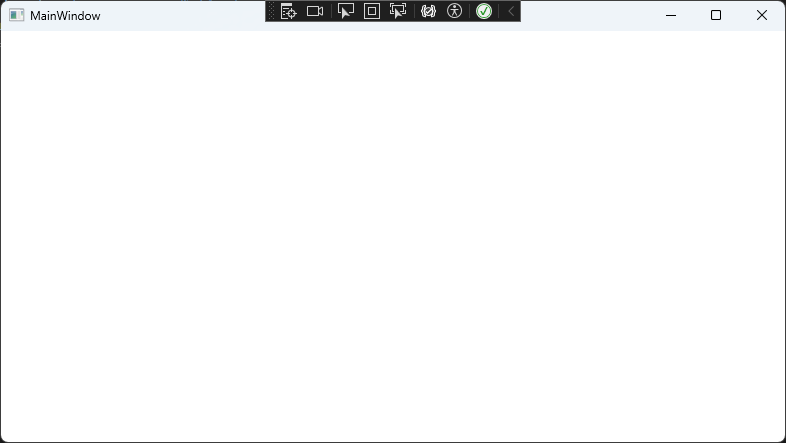
为什么启动之后是这样的呢?
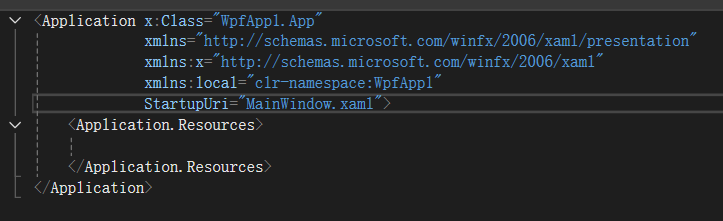
我们知道是因为在App.xaml中我们设置了StartupUri="MainWindow.xaml"。
现在来看看Stylet.Samples.Hello的结构:

再来看看它的App.xaml:
<Application x:Class="Stylet.Samples.Hello.App" xmlns="http://schemas.microsoft.com/winfx/2006/xaml/presentation" xmlns:x="http://schemas.microsoft.com/winfx/2006/xaml" xmlns:s="https://github.com/canton7/Stylet" xmlns:local="clr-namespace:Stylet.Samples.Hello"> <Application.Resources> <s:ApplicationLoader> <s:ApplicationLoader.Bootstrapper> <local:HelloBootstrapper/> </s:ApplicationLoader.Bootstrapper> </s:ApplicationLoader> </Application.Resources> </Application> 我们发现它删掉了StartupUri,然后多了一个<s:ApplicationLoader>。
说明启动起来就显示ShellView的玄机就在其中!!
Stylet启动机制
Stylet的启动流程可以分为以下几个关键阶段:
- WPF应用程序启动(Application.Startup)
- ApplicationLoader初始化(XAML解析阶段)
- Bootstrapper配置与启动
- IoC容器初始化
- 根视图模型创建
- 视图定位与创建
- 窗口显示
看似一个简单的启动过程,其实作者做了很多的处理!!
现在就让我们来看看吧!!
阶段1:WPF应用程序启动
<Application x:Class="Stylet.Samples.Hello.App" xmlns="http://schemas.microsoft.com/winfx/2006/xaml/presentation" xmlns:x="http://schemas.microsoft.com/winfx/2006/xaml" xmlns:s="https://github.com/canton7/Stylet" xmlns:local="clr-namespace:Stylet.Samples.Hello"> <Application.Resources> <s:ApplicationLoader> <s:ApplicationLoader.Bootstrapper> <local:HelloBootstrapper/> </s:ApplicationLoader.Bootstrapper> </s:ApplicationLoader> </Application.Resources> </Application> 当WPF解析App.xaml时,会创建ApplicationLoader实例。ApplicationLoader是Stylet提供的特殊资源字典,继承自ResourceDictionary,ApplicationLoader的构造函数会立即执行,加载Stylet的基础资源。
来看下ApplicationLoader的源码:
public class ApplicationLoader : ResourceDictionary { private readonly ResourceDictionary styletResourceDictionary; public ApplicationLoader() { // 加载Stylet的基础样式资源 this.styletResourceDictionary = new ResourceDictionary() { Source = new Uri("pack://application:,,,/Stylet;component/Xaml/StyletResourceDictionary.xaml", UriKind.Absolute) }; this.LoadStyletResources = true; } public IBootstrapper Bootstrapper { get => this._bootstrapper; set { this._bootstrapper = value; // 关键:立即调用Setup方法 this._bootstrapper.Setup(Application.Current); } } } 当XAML解析器遇到<local:HelloBootstrapper/>时,会:
- 创建HelloBootstrapper实例
- 设置给ApplicationLoader.Bootstrapper属性
- 触发Bootstrapper.Setup(Application.Current)调用
阶段2:Bootstrapper配置与启动
HelloBootstrapper:
public class HelloBootstrapper : Bootstrapper<ShellViewModel> { // 空实现!所有功能都在基类中 } 虽然HelloBootstrapper看起来很简单,但它继承的Bootstrapper
现在来看看HelloBootstrapper的继承链:
HelloBootstrapper ↓ Bootstrapper<ShellViewModel> ↓ StyletIoCBootstrapperBase ↓ BootstrapperBase 刚刚在阶段1中看到的Setup方法在BootstrapperBase中,现在来看看:
public void Setup(Application application) { this.Application = application; // 设置UI线程调度器 Execute.Dispatcher = new ApplicationDispatcher(this.Application.Dispatcher); // 关键:注册Startup事件 this.Application.Startup += (o, e) => this.Start(e.Args); // 注册其他生命周期事件 this.Application.Exit += (o, e) => { this.OnExit(e); this.Dispose(); }; this.Application.DispatcherUnhandledException += (o, e) => { LogManager.GetLogger(typeof(BootstrapperBase)).Error(e.Exception, "Unhandled exception"); this.OnUnhandledException(e); }; } Setup方法在XAML解析阶段就被调用,但实际的启动逻辑在Application.Startup事件触发时才执行,这确保了所有配置都在UI线程上完成。
阶段3:IoC容器初始化
现在重点看看这个:
// 关键:注册Startup事件 this.Application.Startup += (o, e) => this.Start(e.Args); 我们看到作者为this.Application.Startup事件增加了事件处理函数/程序 (o, e) => this.Start(e.Args)。
现在我们来看看这个事件处理函数/程序:
public virtual void Start(string[] args) { // 1. 保存命令行参数 this.Args = args; this.OnStart(); // 2. 配置Bootstrapper(主要是IoC容器) this.ConfigureBootstrapper(); // 3. 注册ViewManager到应用程序资源 this.Application?.Resources.Add(View.ViewManagerResourceKey, this.GetInstance(typeof(IViewManager))); // 4. 用户自定义配置 this.Configure(); // 5. 显示根视图 this.Launch(); // 6. 启动完成通知 this.OnLaunch(); } 先来看看StyletIoC容器配置:
protected sealed override void ConfigureBootstrapper() { var builder = new StyletIoCBuilder(); builder.Assemblies = new List<Assembly>(new List<Assembly>() { this.GetType().Assembly }); // 用户自定义IoC配置 this.ConfigureIoC(builder); // 默认配置 this.DefaultConfigureIoC(builder); // 构建容器 this.Container = builder.BuildContainer(); } protected virtual void DefaultConfigureIoC(StyletIoCBuilder builder) { // 配置ViewManager var viewManagerConfig = new ViewManagerConfig() { ViewFactory = this.GetInstance, ViewAssemblies = new List<Assembly>() { this.GetType().Assembly } }; builder.Bind<ViewManagerConfig>().ToInstance(viewManagerConfig).AsWeakBinding(); // 注册核心服务 builder.Bind<IViewManager>().And<ViewManager>().To<ViewManager>().InSingletonScope(); builder.Bind<IWindowManager>().To<WindowManager>().InSingletonScope(); builder.Bind<IEventAggregator>().To<EventAggregator>().InSingletonScope(); // 自动绑定特性 builder.Autobind(); } 注册的默认服务:
- IViewManager → ViewManager(视图管理器)
- IWindowManager → WindowManager(窗口管理器)
- IEventAggregator → EventAggregator(事件聚合器)
阶段4:根视图模型创建
现在来看看Bootstrapper<TRootViewModel>:
public abstract class Bootstrapper<TRootViewModel> : StyletIoCBootstrapperBase where TRootViewModel : class { private TRootViewModel _rootViewModel; // 延迟加载根视图模型 protected virtual TRootViewModel RootViewModel => this._rootViewModel ??= this.Container.Get<TRootViewModel>(); // 启动时显示根视图 protected override void Launch() { this.DisplayRootView(this.RootViewModel); } } 关键点:
- 使用延迟加载模式,只有在需要时才创建TRootViewModel
- 通过IoC容器解析ShellViewModel,支持构造函数注入
- 在HelloBootstrapper中,TRootViewModel就是ShellViewModel
阶段5:视图定位与创建
现在来看看DisplayRootView方法:
protected virtual void DisplayRootView(object rootViewModel) { var windowManager = (IWindowManager)this.GetInstance(typeof(IWindowManager)); windowManager.ShowWindow(rootViewModel); } 现在来看看ShowWindow方法:
public void ShowWindow(object viewModel) { this.CreateWindow(viewModel, false, null).Show(); } 现在来看看CreateWindow方法:
protected virtual Window CreateWindow(object viewModel, bool isDialog, IViewAware ownerViewModel) { // 1. 通过ViewManager创建视图 UIElement view = this.viewManager.CreateAndBindViewForModelIfNecessary(viewModel); // 2. 确保视图是Window类型 if (view is not Window window) { throw new StyletInvalidViewTypeException(...); } // 3. 设置窗口属性 if (viewModel is IHaveDisplayName haveDisplayName) { window.SetBinding(Window.TitleProperty, new Binding("DisplayName")); } // 4. 设置窗口位置 if (window.WindowStartupLocation == WindowStartupLocation.Manual) { window.WindowStartupLocation = WindowStartupLocation.CenterScreen; } return window; } 现在再来看看CreateAndBindViewForModelIfNecessary方法:
public virtual UIElement CreateAndBindViewForModelIfNecessary(object model) { if (model is IViewAware modelAsViewAware && modelAsViewAware.View != null) { logger.Info("ViewModel {0} already has a View attached to it. Not attaching another", model); return modelAsViewAware.View; } return this.CreateAndBindViewForModel(model); } 在这里得到了ViewModel所绑定的View。
阶段6:ShellView显示全过程
WPF Application ↓ Application Startup ↓ ApplicationLoader.Setup() ↓ Bootstrapper.Setup() ↓ 注册Startup事件 ↓ Application.Startup触发 ↓ Bootstrapper.Start() ↓ ConfigureBootstrapper() ↓ IoC容器构建 ↓ Launch()调用 ↓ DisplayRootView(ShellViewModel) ↓ WindowManager.ShowWindow() ↓ ViewManager.CreateViewForModel() ↓ 定位ShellView类型 ↓ 创建ShellView实例 ↓ 绑定ShellView到ShellViewModel ↓ 显示ShellView窗口 看似一个简单的操作,其实作者做了很多工作。
从这个探索中我们可以了解什么?
- 声明式配置:通过XAML配置启动器
- 约定优于配置:自动的ViewModel-View映射
- 依赖注入:自动的依赖解析
- 生命周期管理:完整的应用程序生命周期钩子
- 可扩展性:通过继承和重写实现自定义
Stylet的设计哲学是让简单的事情保持简单,让复杂的事情成为可能。通过理解这些基础机制,你可以构建出更加优雅和可维护的WPF应用程序。


![洛谷 P11345 [KTSC 2023 R2] 基地简化 题解](http://www.itfaba.com/wp-content/themes/kemi/timthumb.php?src=http://www.itfaba.com/wp-content/themes/kemi/img/random/2.jpg&w=218&h=124&zc=1)
